• About
  • Exhibitions 2024-2012
  • Exhibitions 2011-2000
  • Exhibitions 1999-1988
  • Publication
  • Collaboration
  • Drawing/Studies
Menu

Mark Braunias

Street Address
City, State, Zip
Phone Number

Your Custom Text Here

Mark Braunias

  • About
  • Exhibitions 2024-2012
  • Exhibitions 2011-2000
  • Exhibitions 1999-1988
  • Publication
  • Collaboration
  • Drawing/Studies

Auckland Art Fair (2024)

Solo Booth in association with Jonathan Smart Gallery. April 18-22, 2024.

1a.jpg
2.jpg
3.jpg
4.jpg
5.jpg
7.jpg
   Inside Orange   (acrylic on unstretched canvas) 2100 x 1300mm, 2024 (private collection).

Inside Orange (acrylic on unstretched canvas) 2100 x 1300mm, 2024 (private collection).

   Polyester Smile   (acrylic on unstretched canvas) 2100 x 1300mm, 2024

Polyester Smile (acrylic on unstretched canvas) 2100 x 1300mm, 2024

   Chrysalid    (acrylic on unstretched canvas) 2100 x 1300mm, 2024

Chrysalid (acrylic on unstretched canvas) 2100 x 1300mm, 2024

   Lotus Eater   (acrylic on unstretched canvas) 2100 x 1300mm, 2024

Lotus Eater (acrylic on unstretched canvas) 2100 x 1300mm, 2024

   Cheese   (acrylic on unstretched canvas) 2100 x 1300mm, 2024

Cheese (acrylic on unstretched canvas) 2100 x 1300mm, 2024

   Sweet Jane   (acrylic on unstretched canvas) 1200 x 900mm, 2024

Sweet Jane (acrylic on unstretched canvas) 1200 x 900mm, 2024

   Striped   (acrylic on unstretched canvas) 1200 x 900mm, 2024

Striped (acrylic on unstretched canvas) 1200 x 900mm, 2024

   Untitled (study)   acrylic on paper, 320 x 175mm, 2023 (private collection).

Untitled (study) acrylic on paper, 320 x 175mm, 2023 (private collection).

   Untitled (study)   acrylic on paper, 320 x 175mm, 2023 (private collection).

Untitled (study) acrylic on paper, 320 x 175mm, 2023 (private collection).

   Untitled (study)   acrylic on paper, 320 x 175mm, 2023 (private collection).

Untitled (study) acrylic on paper, 320 x 175mm, 2023 (private collection).

   Untitled (study)   acrylic on paper, 320 x 175mm, 2023

Untitled (study) acrylic on paper, 320 x 175mm, 2023

 Exhibition catalogue published on the occasion of the Auckland Art Fair by Jonathan Smart Gallery, April 2024.   Design : Jane Maloney.   Interview and essay: Hamish Win.  Printer: Blueprint Media

Exhibition catalogue published on the occasion of the Auckland Art Fair by Jonathan Smart Gallery, April 2024.

Design : Jane Maloney.

Interview and essay: Hamish Win.

Printer: Blueprint Media

 Exhibition catalogue (front pages)

Exhibition catalogue (front pages)

 Exhibition catalogue (inside pages)

Exhibition catalogue (inside pages)

 Exhibition catalogue (centre page)

Exhibition catalogue (centre page)

 Exhibition catalogue (inside pages)

Exhibition catalogue (inside pages)

 Exhibition catalogue (list of works)

Exhibition catalogue (list of works)

 Exhibition catalogue (end pages)

Exhibition catalogue (end pages)

Morrinsville Gallery, Waikato (2024)

Solo exhibition: Assemble,Disassemble, Reassemble. Biomorphic Drawings (2010-24) 10 July -1 September, 2024.

 Front Gallery. R/h side (ink and acrylic on paper) Each work 2100 x 1500mm. Various dates. Photogrsaph: Gina Berreto.

Front Gallery. R/h side (ink and acrylic on paper) Each work 2100 x 1500mm. Various dates. Photogrsaph: Gina Berreto.

 Front Gallery. R/h side (ink and acrylic on paper) Easch work 2100 x 1500mm. Various dates.

Front Gallery. R/h side (ink and acrylic on paper) Easch work 2100 x 1500mm. Various dates.

 Front Gallery.R/h side (ink and acrylic on paper): Each work 2100 x 1500mm. Various dates.

Front Gallery.R/h side (ink and acrylic on paper): Each work 2100 x 1500mm. Various dates.

 Front Gallery R/h side (ink and acrylic on paper) Each work 2100 x 1500mm. Various dates.

Front Gallery R/h side (ink and acrylic on paper) Each work 2100 x 1500mm. Various dates.

 Front Gallery. R/h side. Each work 2100 x  1500mm. Various dates.

Front Gallery. R/h side. Each work 2100 x 1500mm. Various dates.

 Front Gallery. L/h side. 2100 x 300mm (ink and acrylic on paper) 2012.

Front Gallery. L/h side. 2100 x 300mm (ink and acrylic on paper) 2012.

 Front Gallery. L/h side. 2100 x 300mm (ink and acrylic on paper) 2012. Detail

Front Gallery. L/h side. 2100 x 300mm (ink and acrylic on paper) 2012. Detail

 Back Gallery. L/h side. Each work: 2100 x 300mm (ink and acrylic on paper) Various dates.

Back Gallery. L/h side. Each work: 2100 x 300mm (ink and acrylic on paper) Various dates.

 Back Gallery. L/h side. Each work: 2100 x 300mm (ink and acrylic on paper) Various dates.

Back Gallery. L/h side. Each work: 2100 x 300mm (ink and acrylic on paper) Various dates.

 Back Gallery. End Wall (ink and acrylic on paper) 2100 x 3900mm. 2012

Back Gallery. End Wall (ink and acrylic on paper) 2100 x 3900mm. 2012

 Back Gallery. L/h side. Each work: 2100 x 300mm (ink and acrylic on paper) 2012. Detail

Back Gallery. L/h side. Each work: 2100 x 300mm (ink and acrylic on paper) 2012. Detail

 Back Gallery. L/h side. Each work: 2100 x 300mm (ink and acrylic on paper) Various dates.

Back Gallery. L/h side. Each work: 2100 x 300mm (ink and acrylic on paper) Various dates.

 Back Gallery. End wall. Each work: 2100 x 300mm (ink and acrylic on paper) Various dates.

Back Gallery. End wall. Each work: 2100 x 300mm (ink and acrylic on paper) Various dates.

 Back Gallery. End wall. (acrylic on paper) 2100 x 3900mm. 2012. Photograph: Alan Murphy Design.

Back Gallery. End wall. (acrylic on paper) 2100 x 3900mm. 2012. Photograph: Alan Murphy Design.

 Back Gallery. End wall (ink and acrylic on paper) 2100 x 3900mm, 2012. Detail

Back Gallery. End wall (ink and acrylic on paper) 2100 x 3900mm, 2012. Detail

 Back Gallery. R/h side. Rolled/unrolled works on paper (ink and acrylic on paper) Various dates.

Back Gallery. R/h side. Rolled/unrolled works on paper (ink and acrylic on paper) Various dates.

 Detail

Detail

 Evening performance in the Gallery.

Evening performance in the Gallery.

 Poster for the exhibition.

Poster for the exhibition.

Brett McDowell Gallery, Dunedin (2024)

Pollyanna is Twiggy Ginger, Solo Exhibition , 27 September - 17 October 2024

 Invite card

Invite card

 Front Space.

Front Space.

 Unreal Times 1 and 11

Unreal Times 1 and 11

 Loco Dreams

Loco Dreams

 Two Spaces

Two Spaces

 Back Space L/H side.

Back Space L/H side.

 Back Space

Back Space

 End Wall

End Wall

 Back Space walls

Back Space walls

 Pollyanna Is Twiggy Ginger (suite)

Pollyanna Is Twiggy Ginger (suite)

 Pollyanna Is Twiggy Ginger (suite)

Pollyanna Is Twiggy Ginger (suite)

 Unreal Times 1  (acrylic on board) 1235 x 930mm, 2021. 

Unreal Times 1  (acrylic on board) 1235 x 930mm, 2021. 

 Unreal Times 11  (acrylic on board) 1235 x 930mm, 2021. 

Unreal Times 11  (acrylic on board) 1235 x 930mm, 2021. 

 Loco Dreams ii (acrylic on board)) 430 x 330mm, 2024.

Loco Dreams ii (acrylic on board)) 430 x 330mm, 2024.

 Loco Dreams 111 (acrylic on board)) 430 x 330mm, 2024.

Loco Dreams 111 (acrylic on board)) 430 x 330mm, 2024.

 Los Tropos (acrylic enamel on board) 555 x 654mm, 2024

Los Tropos (acrylic enamel on board) 555 x 654mm, 2024

 Touche  (acrylic on board) 1240 x 940mm, 2024

Touche  (acrylic on board) 1240 x 940mm, 2024

 Enter Key (acrylic on board) 935 x 675mm, 2024

Enter Key (acrylic on board) 935 x 675mm, 2024

 Striped (acrylic on un-stretched canvas) 1200 x 900mm, 2024

Striped (acrylic on un-stretched canvas) 1200 x 900mm, 2024

 Inside Out (acrylic on un-stretched canvas) 1200 x 900mm, 2024

Inside Out (acrylic on un-stretched canvas) 1200 x 900mm, 2024

 Chocky (acrylic on un-stretched canvas) 1200 x 900mm, 2024  

Chocky (acrylic on un-stretched canvas) 1200 x 900mm, 2024  

 Sweet Jane (acrylic on un-stretched canvas) 1200 x 900mm, 2024

Sweet Jane (acrylic on un-stretched canvas) 1200 x 900mm, 2024

 Bartleby’s Holiday (acrylic on un-stretched canvas) 2075 x 1310mm, 2024

Bartleby’s Holiday (acrylic on un-stretched canvas) 2075 x 1310mm, 2024

 Pollyanna Is Glad (acrylic on un-stretched canvas) 2100 x 1270mm, 2024

Pollyanna Is Glad (acrylic on un-stretched canvas) 2100 x 1270mm, 2024

 Twiggy Ginger (acrylic on un-stretched canvas) 1950 x 1270mm, 2024

Twiggy Ginger (acrylic on un-stretched canvas) 1950 x 1270mm, 2024

 Hey Diddle (acrylic on un-stretched canvas) 2100 x 1290mm, 2024

Hey Diddle (acrylic on un-stretched canvas) 2100 x 1290mm, 2024

 Sloogan Pamp  (acrylic on un-stretched canvas) 2030 x 490mm, 2024

Sloogan Pamp  (acrylic on un-stretched canvas) 2030 x 490mm, 2024

 Sloogan Pamp 1V  (acrylic on un-stretched canvas) 2030 x 490mm, 2024

Sloogan Pamp 1V  (acrylic on un-stretched canvas) 2030 x 490mm, 2024

Ann Parker Gallery, Whanganui (2024)

Spam Flunk. Solo Exhibition, 27 October - 30 November, 2024

 Front Entrance. Ann Parker Gallery, Whanganui, October 27 - 30 November 2024.

Front Entrance. Ann Parker Gallery, Whanganui, October 27 - 30 November 2024.

 Installation view. Ann Parker Gallery, Whanganui, October 27 - 30 November 2024.

Installation view. Ann Parker Gallery, Whanganui, October 27 - 30 November 2024.

 Installation view. Ann Parker Gallery, Whanganui, October 27 - 30 November 2024.

Installation view. Ann Parker Gallery, Whanganui, October 27 - 30 November 2024.

 Installation view. Ann Parker Gallery, Whanganui, October 27 - 30 November 2024.

Installation view. Ann Parker Gallery, Whanganui, October 27 - 30 November 2024.

 Installation view. Ann Parker Gallery, Whanganui, October 27 - 30 November 2024.

Installation view. Ann Parker Gallery, Whanganui, October 27 - 30 November 2024.

 Installation view. Ann Parker Gallery, Whanganui, October 27 - 30 November 2024.

Installation view. Ann Parker Gallery, Whanganui, October 27 - 30 November 2024.

 Installation view. Ann Parker Gallery, Whanganui, October 27 - 30 November 2024.

Installation view. Ann Parker Gallery, Whanganui, October 27 - 30 November 2024.

 Spam Flunk (acrylic on canvas) 2100 × 1400mm, 2024.

Spam Flunk (acrylic on canvas) 2100 × 1400mm, 2024.

 Sugar Plum Gurl (acrylic on canvas) 2100 × 1300mm, 2024.

Sugar Plum Gurl (acrylic on canvas) 2100 × 1300mm, 2024.

 My Pleasant (acrylic on canvas) 2100 × 1300mm, 2024.

My Pleasant (acrylic on canvas) 2100 × 1300mm, 2024.

 Monk (acrylic on board) 250 × 250mm, 2022 - 24..

Monk (acrylic on board) 250 × 250mm, 2022 - 24..

 Saccharine Decal 1(acrylic on board) 500 × 500mm, 2022 - 24

Saccharine Decal 1(acrylic on board) 500 × 500mm, 2022 - 24

 Saccharine Decal (acrylic on board) 500 × 500mm, 2022-24.

Saccharine Decal (acrylic on board) 500 × 500mm, 2022-24.

Jonathan Smart Gallery, Christchurch (2023)

Water Glass

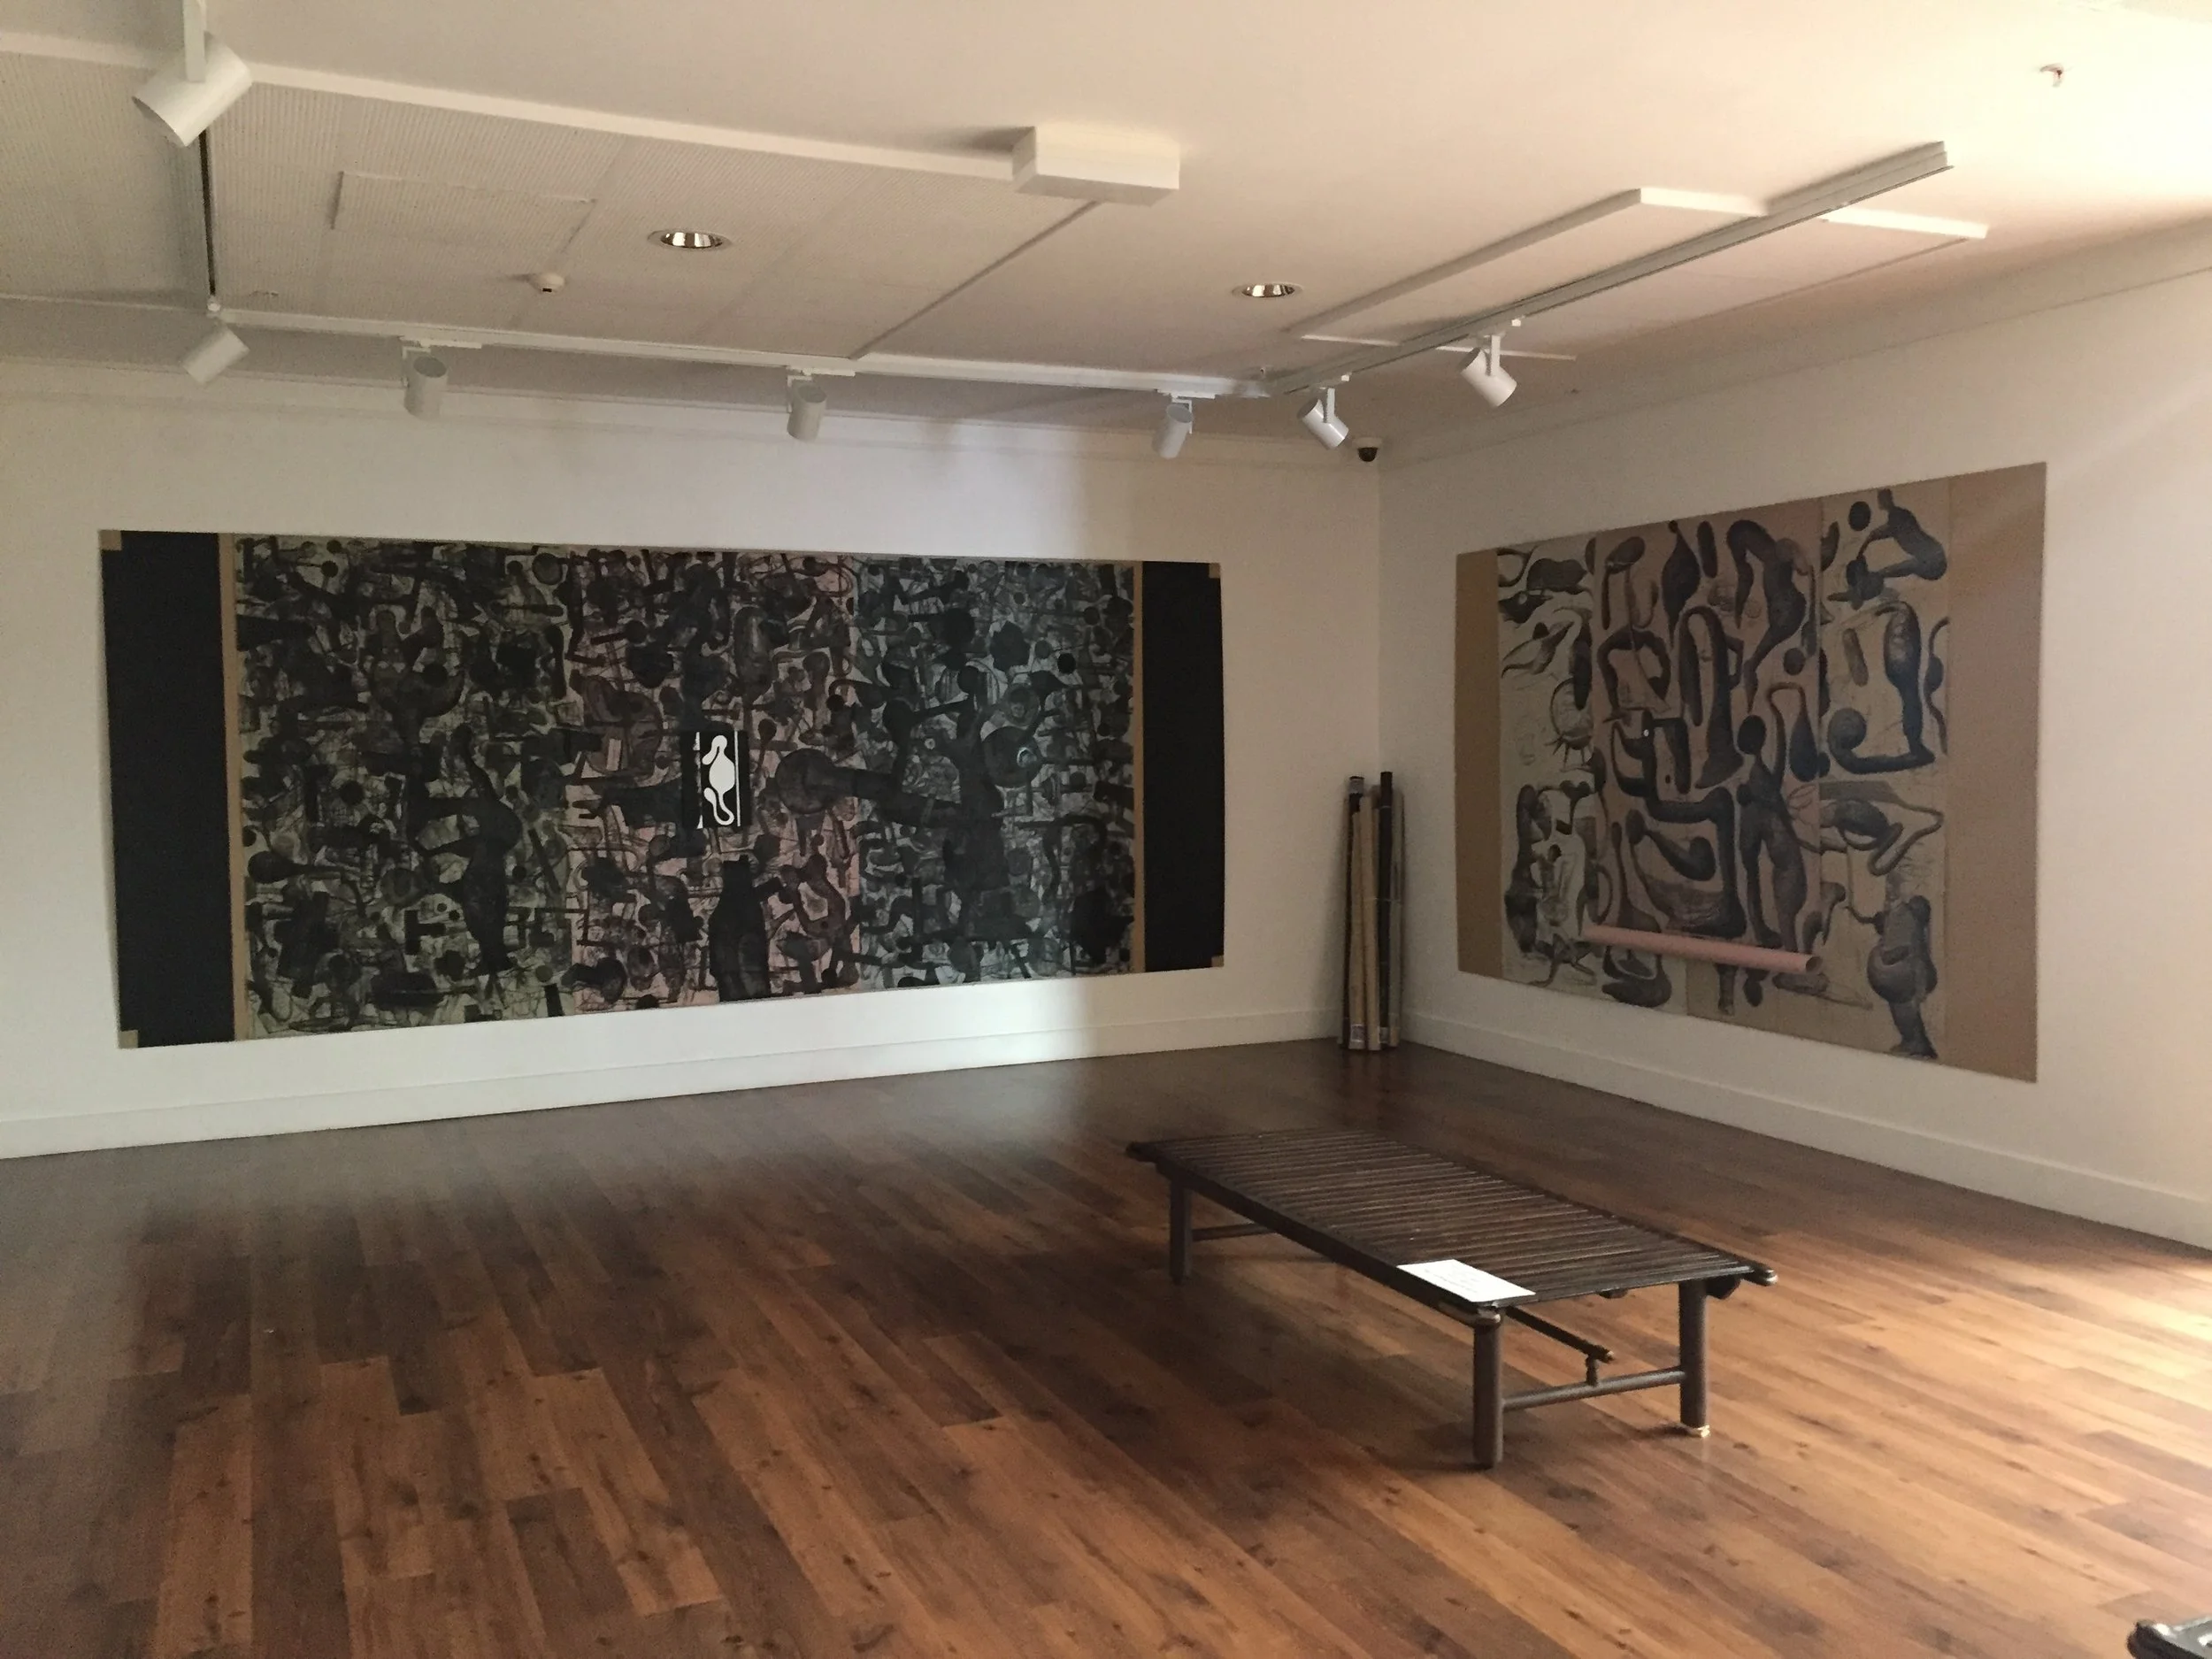
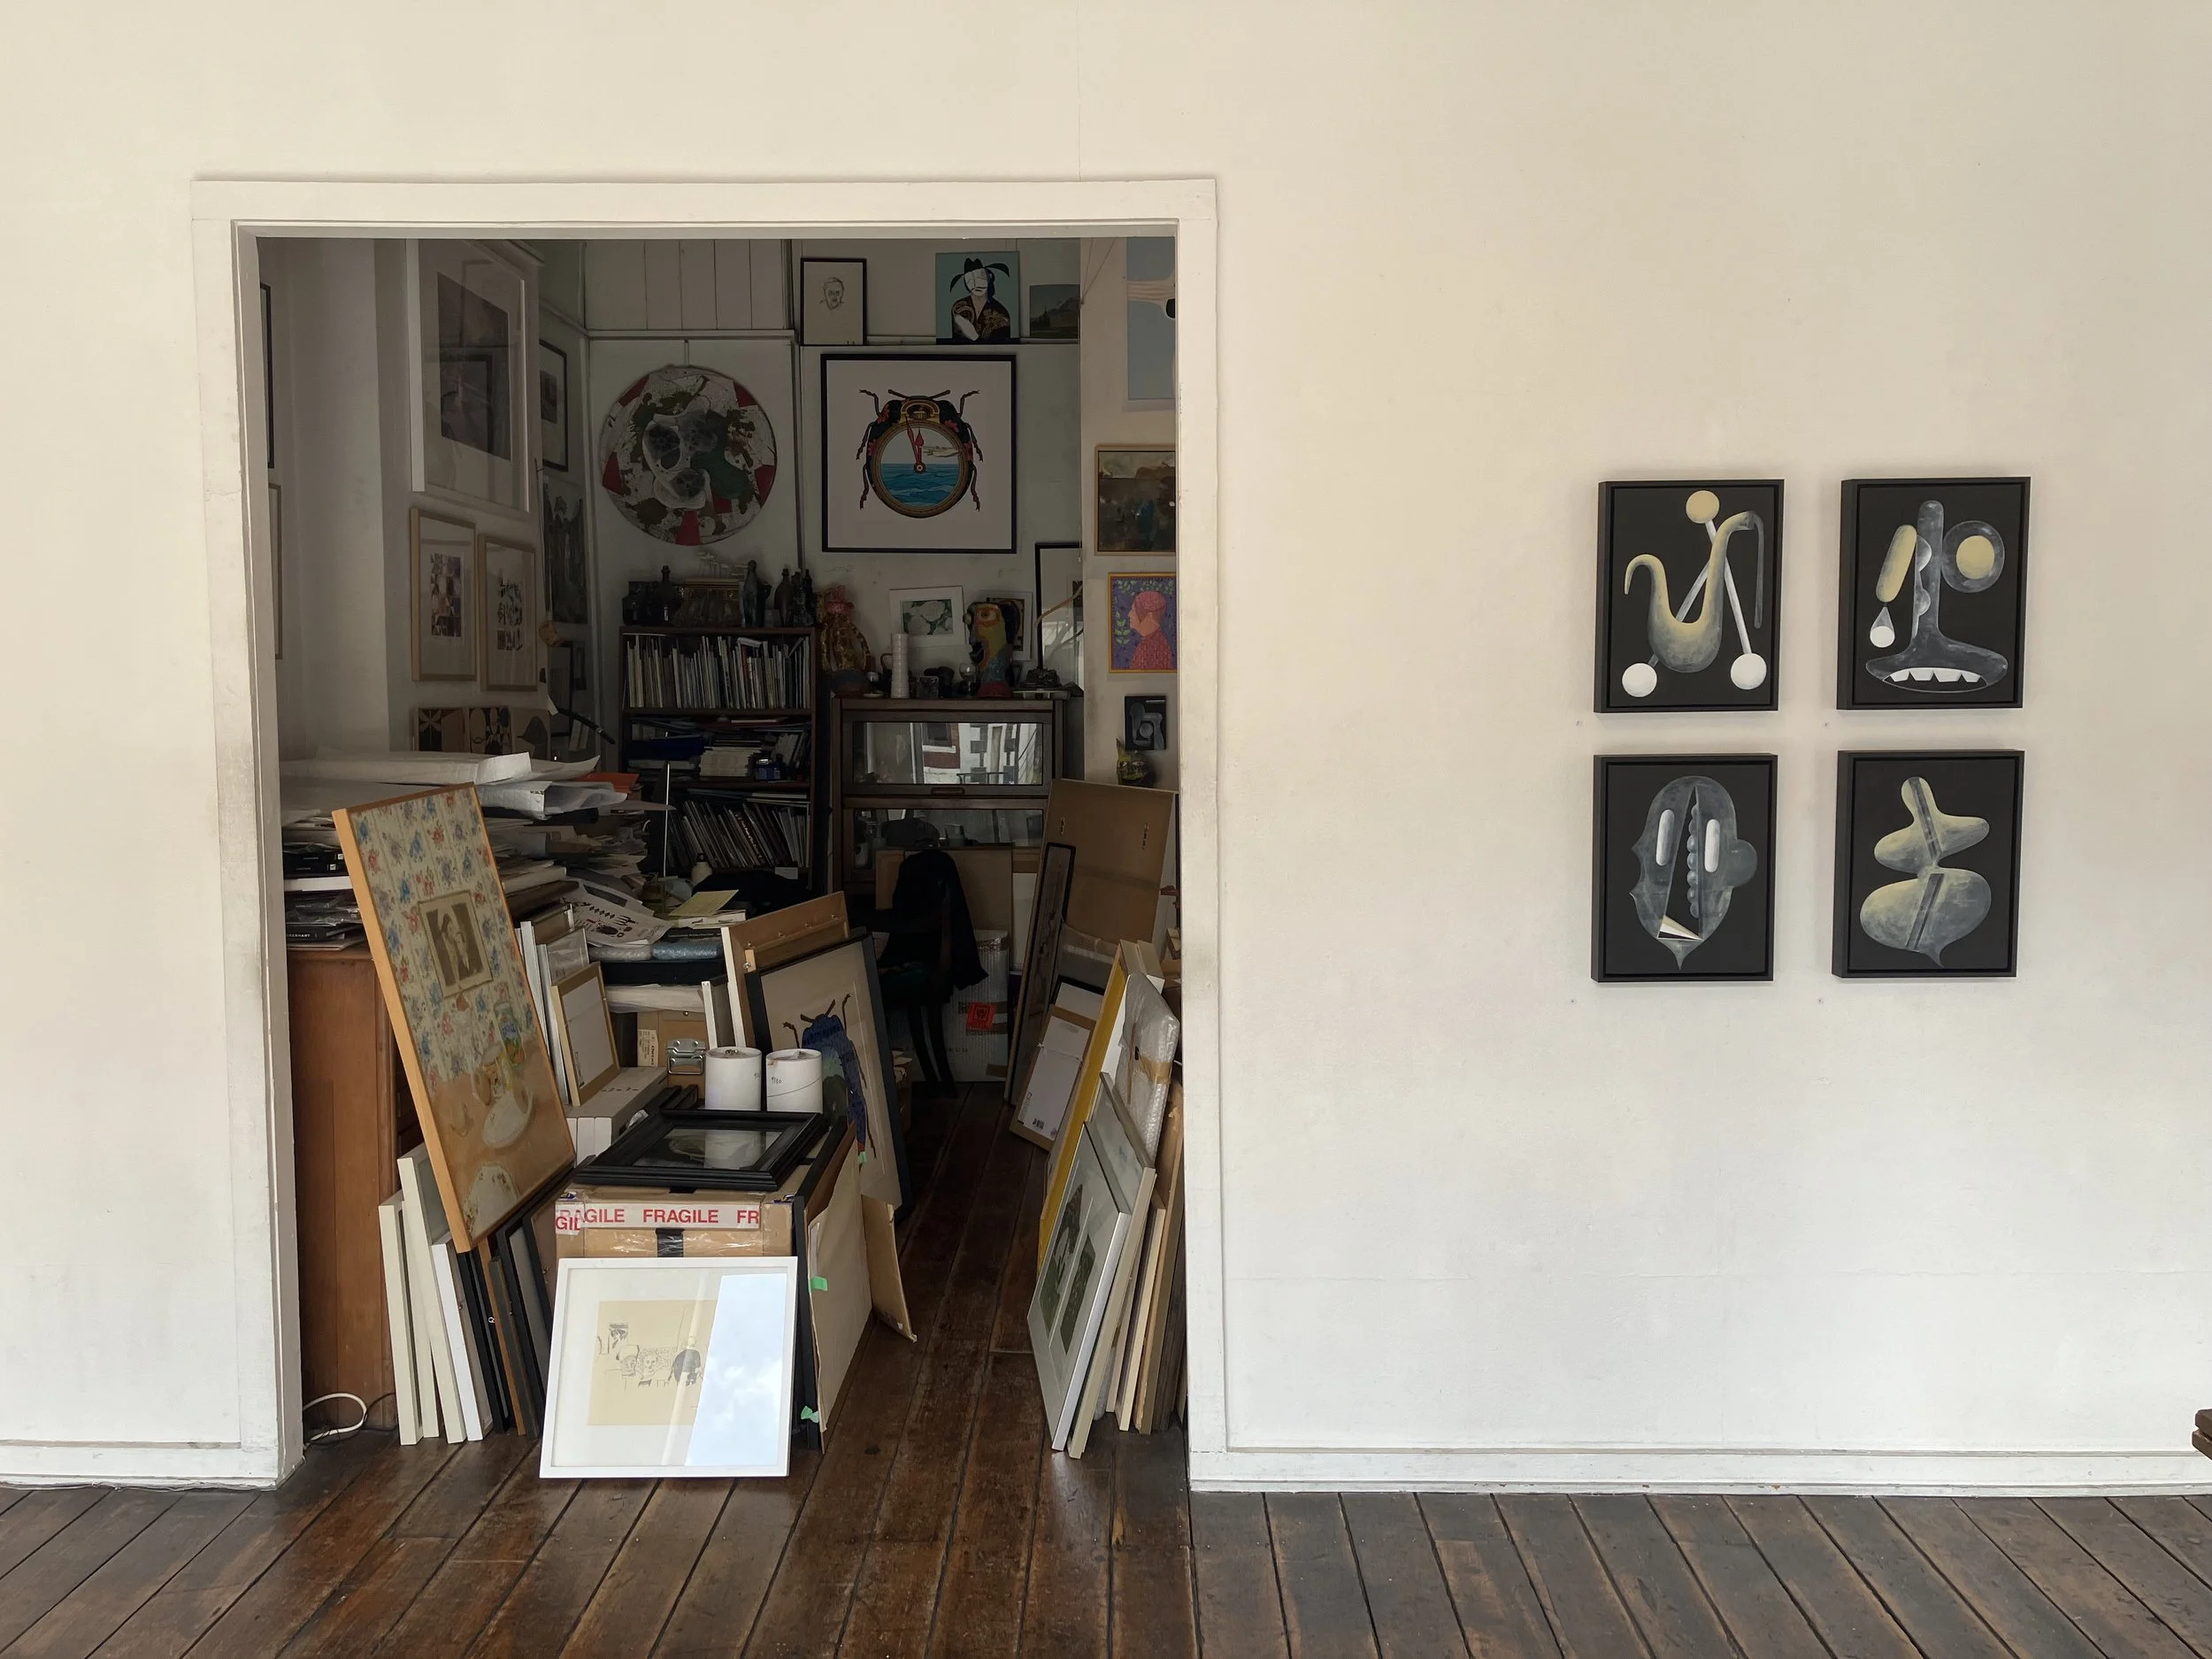
Solo exhibition: Jonathan Smart Gallery, Christchurch. November 21- 16 December 2023

Artist Statement on the Gallery Wall:

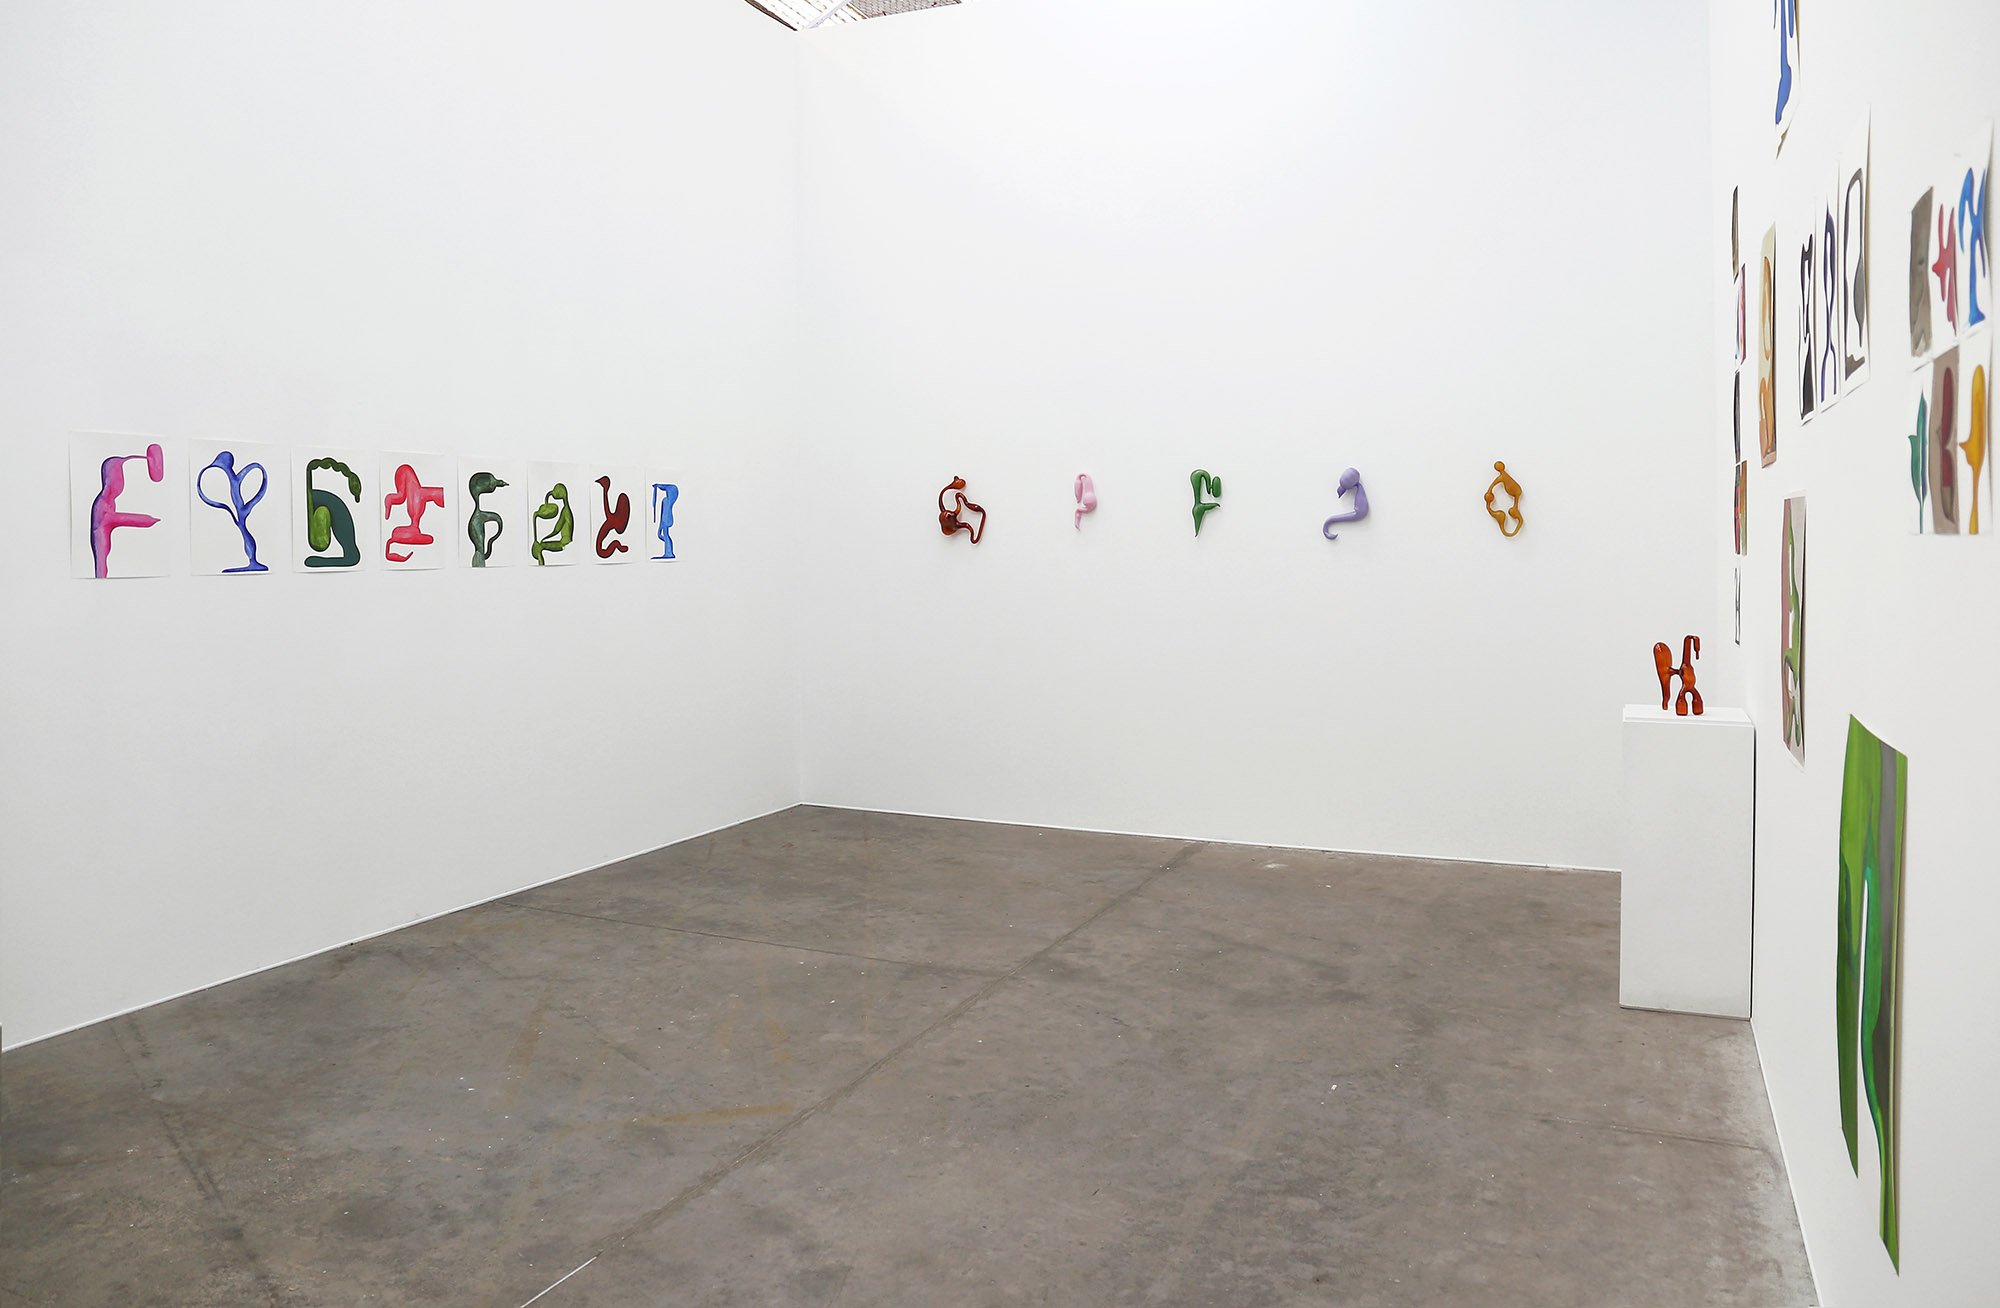
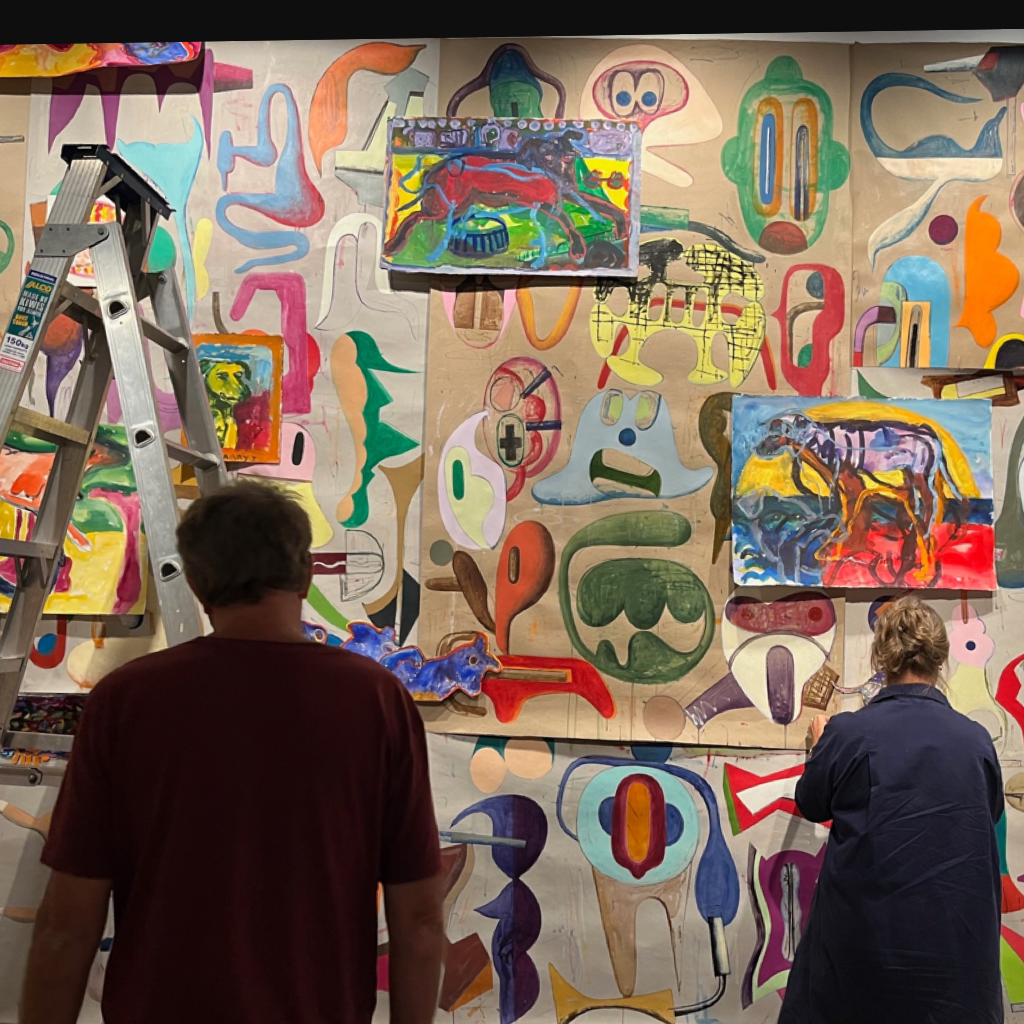
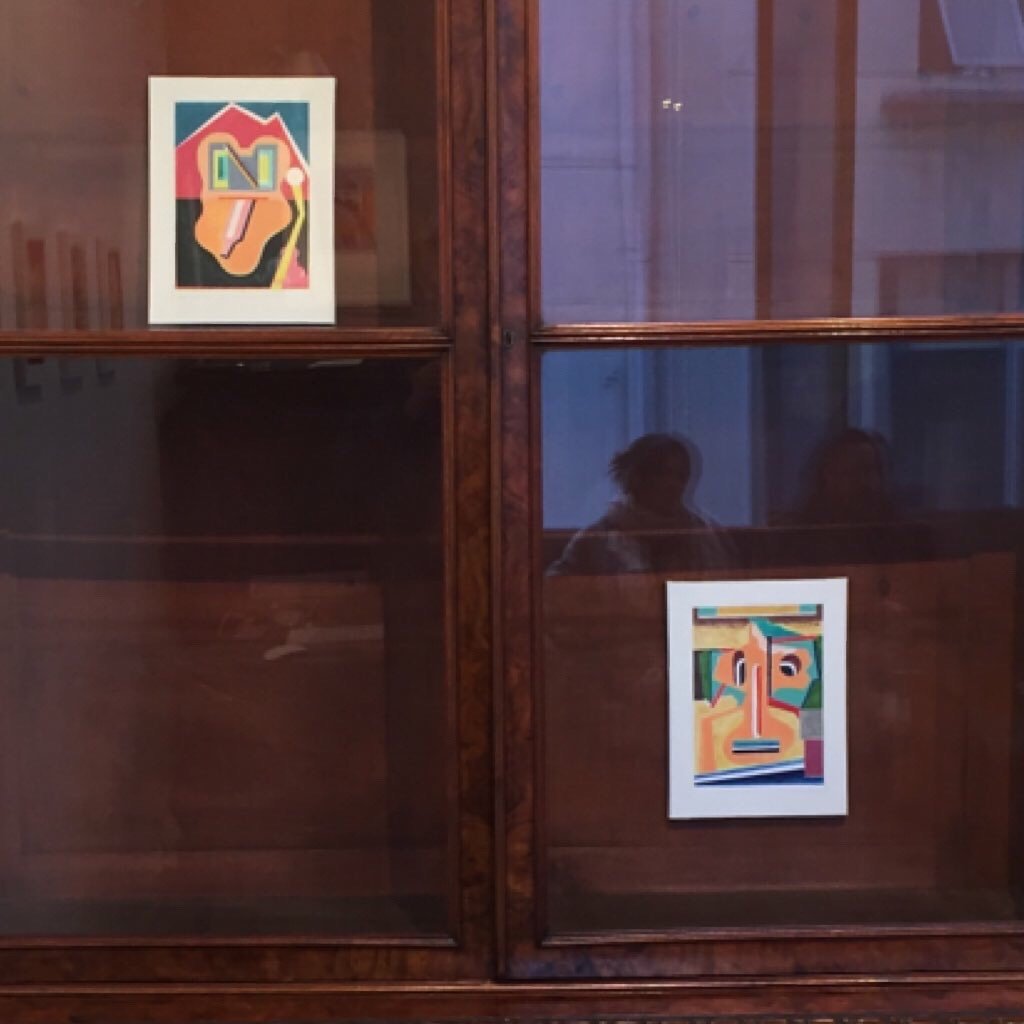
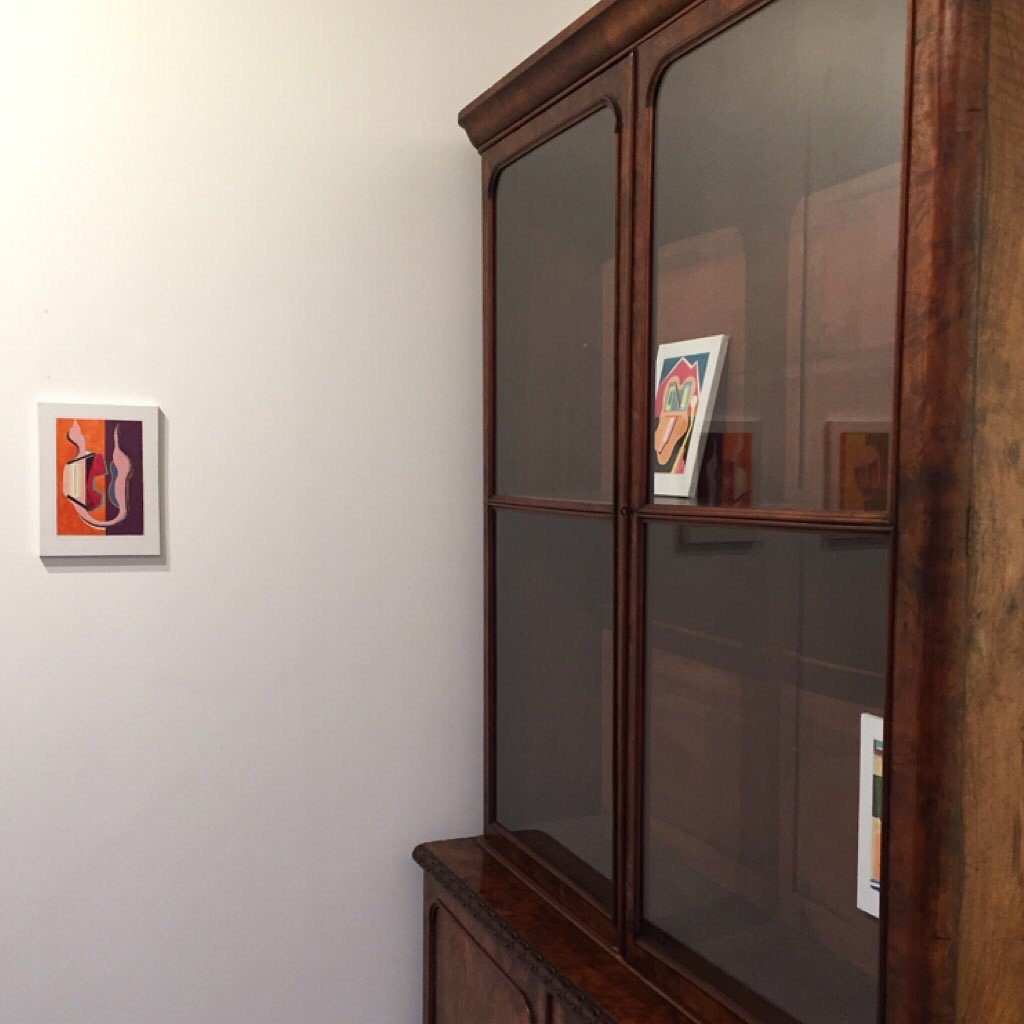
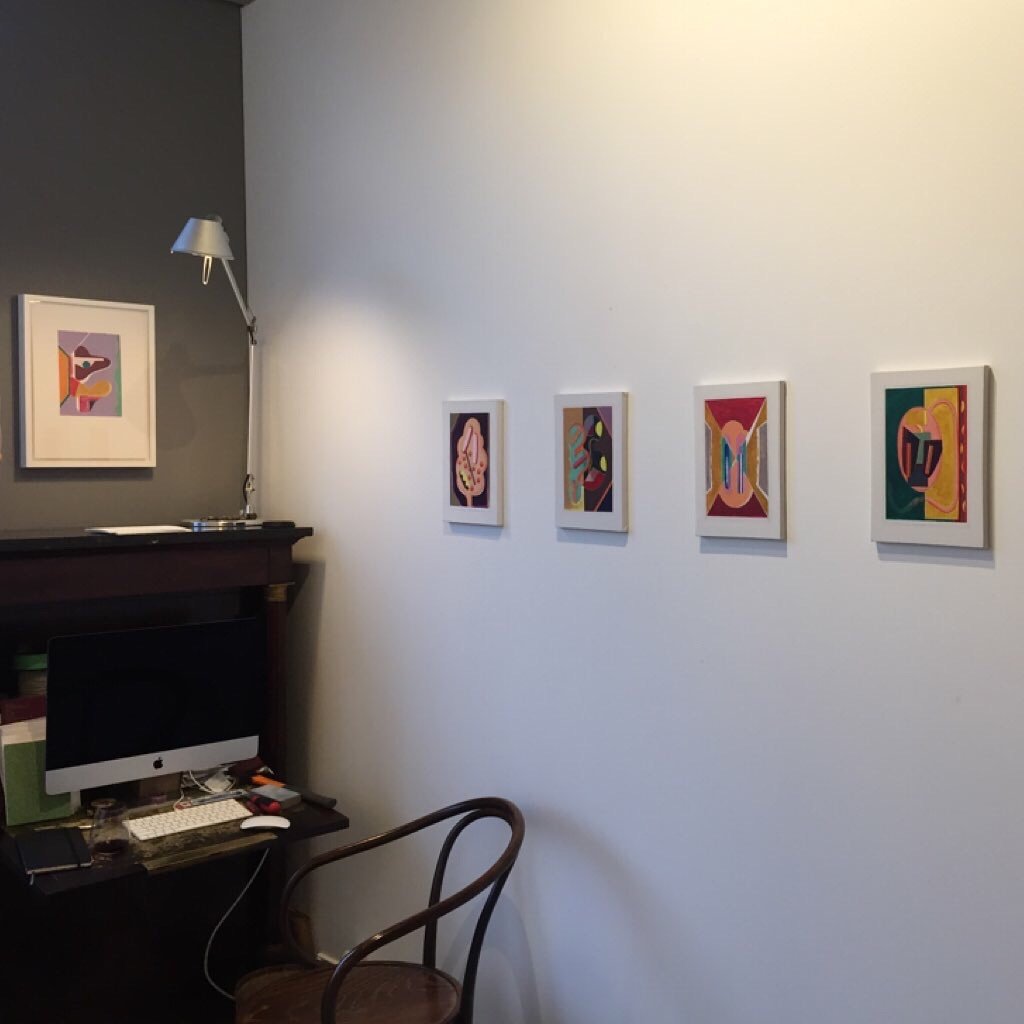
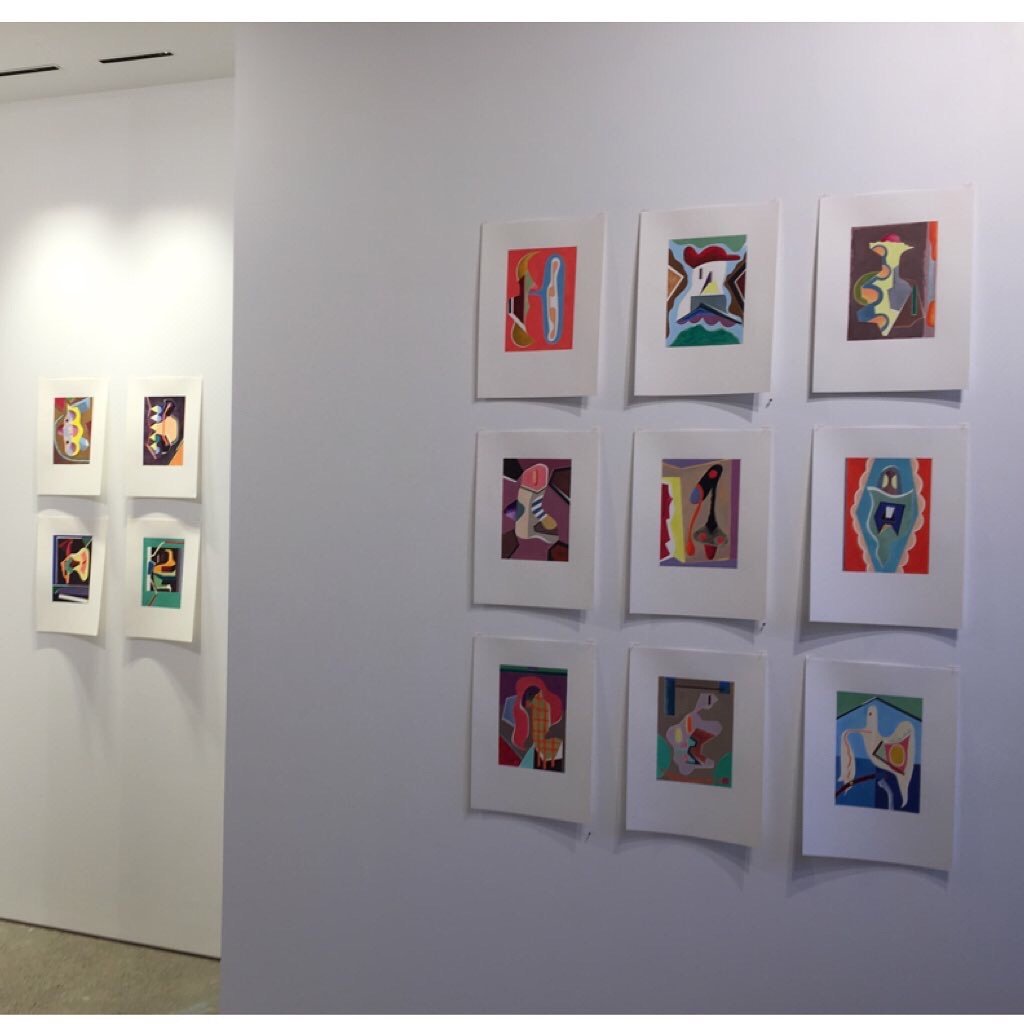
Watercolours on paper by Mark Braunias and glass work made in collaboration with Jarred Wright.

During the Covid lockdown of 2020, I received a DM on my Instagram account from @jw_glassart . I had no idea who this person was. A Jarred Wright from Queensland had wanted to know if he could use one of my translucently painted forms to make a glass work piece. I was immediately intrigued. Back in 2017 when I first started to investigate washes of color to create the illusion of fluid dimensionality, I recognized their glass-like 2D quality. I began to exploit that sensibility and it informed my development with shape. So it seemed like a very natural transition to literally make ‘glass’. When I discovered that as well as his own glass art practice, Jarred also worked for laboratories making medical instruments/apparatus, it made perfect sense to let the hot air blow.

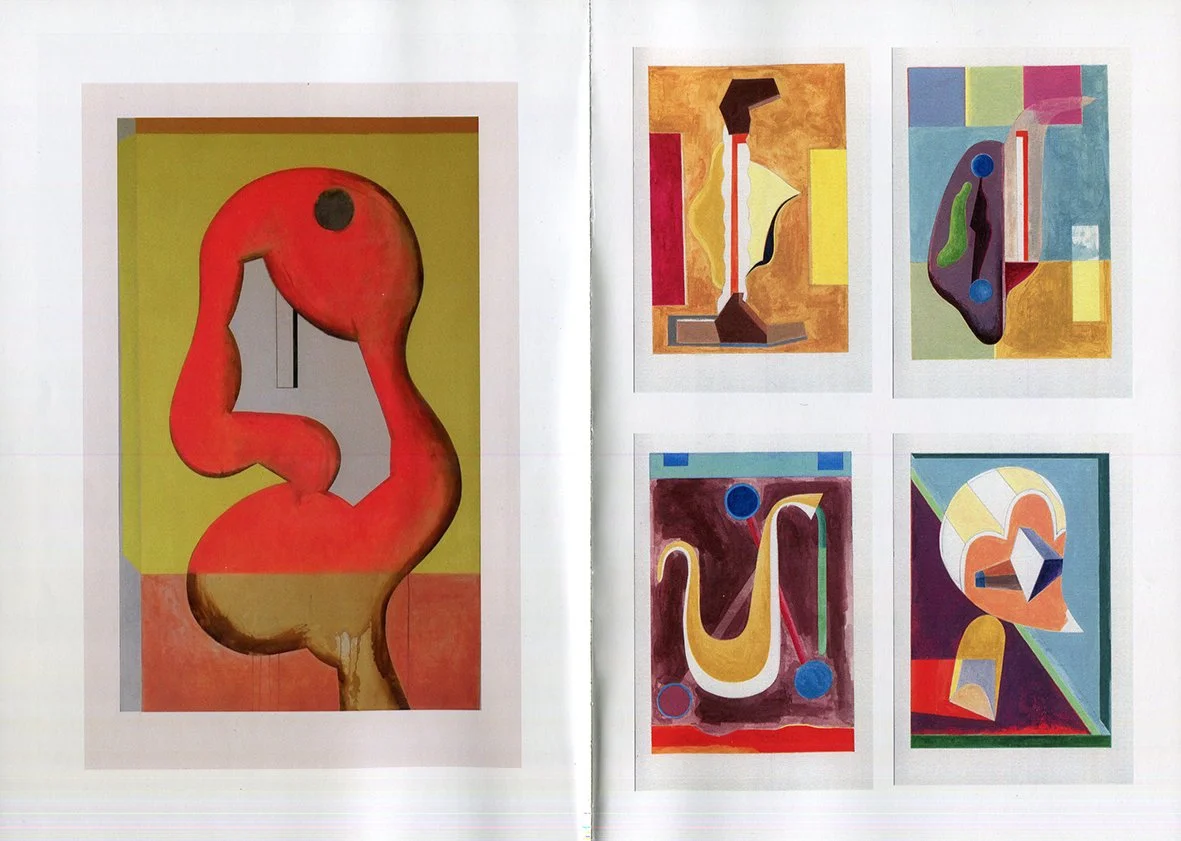
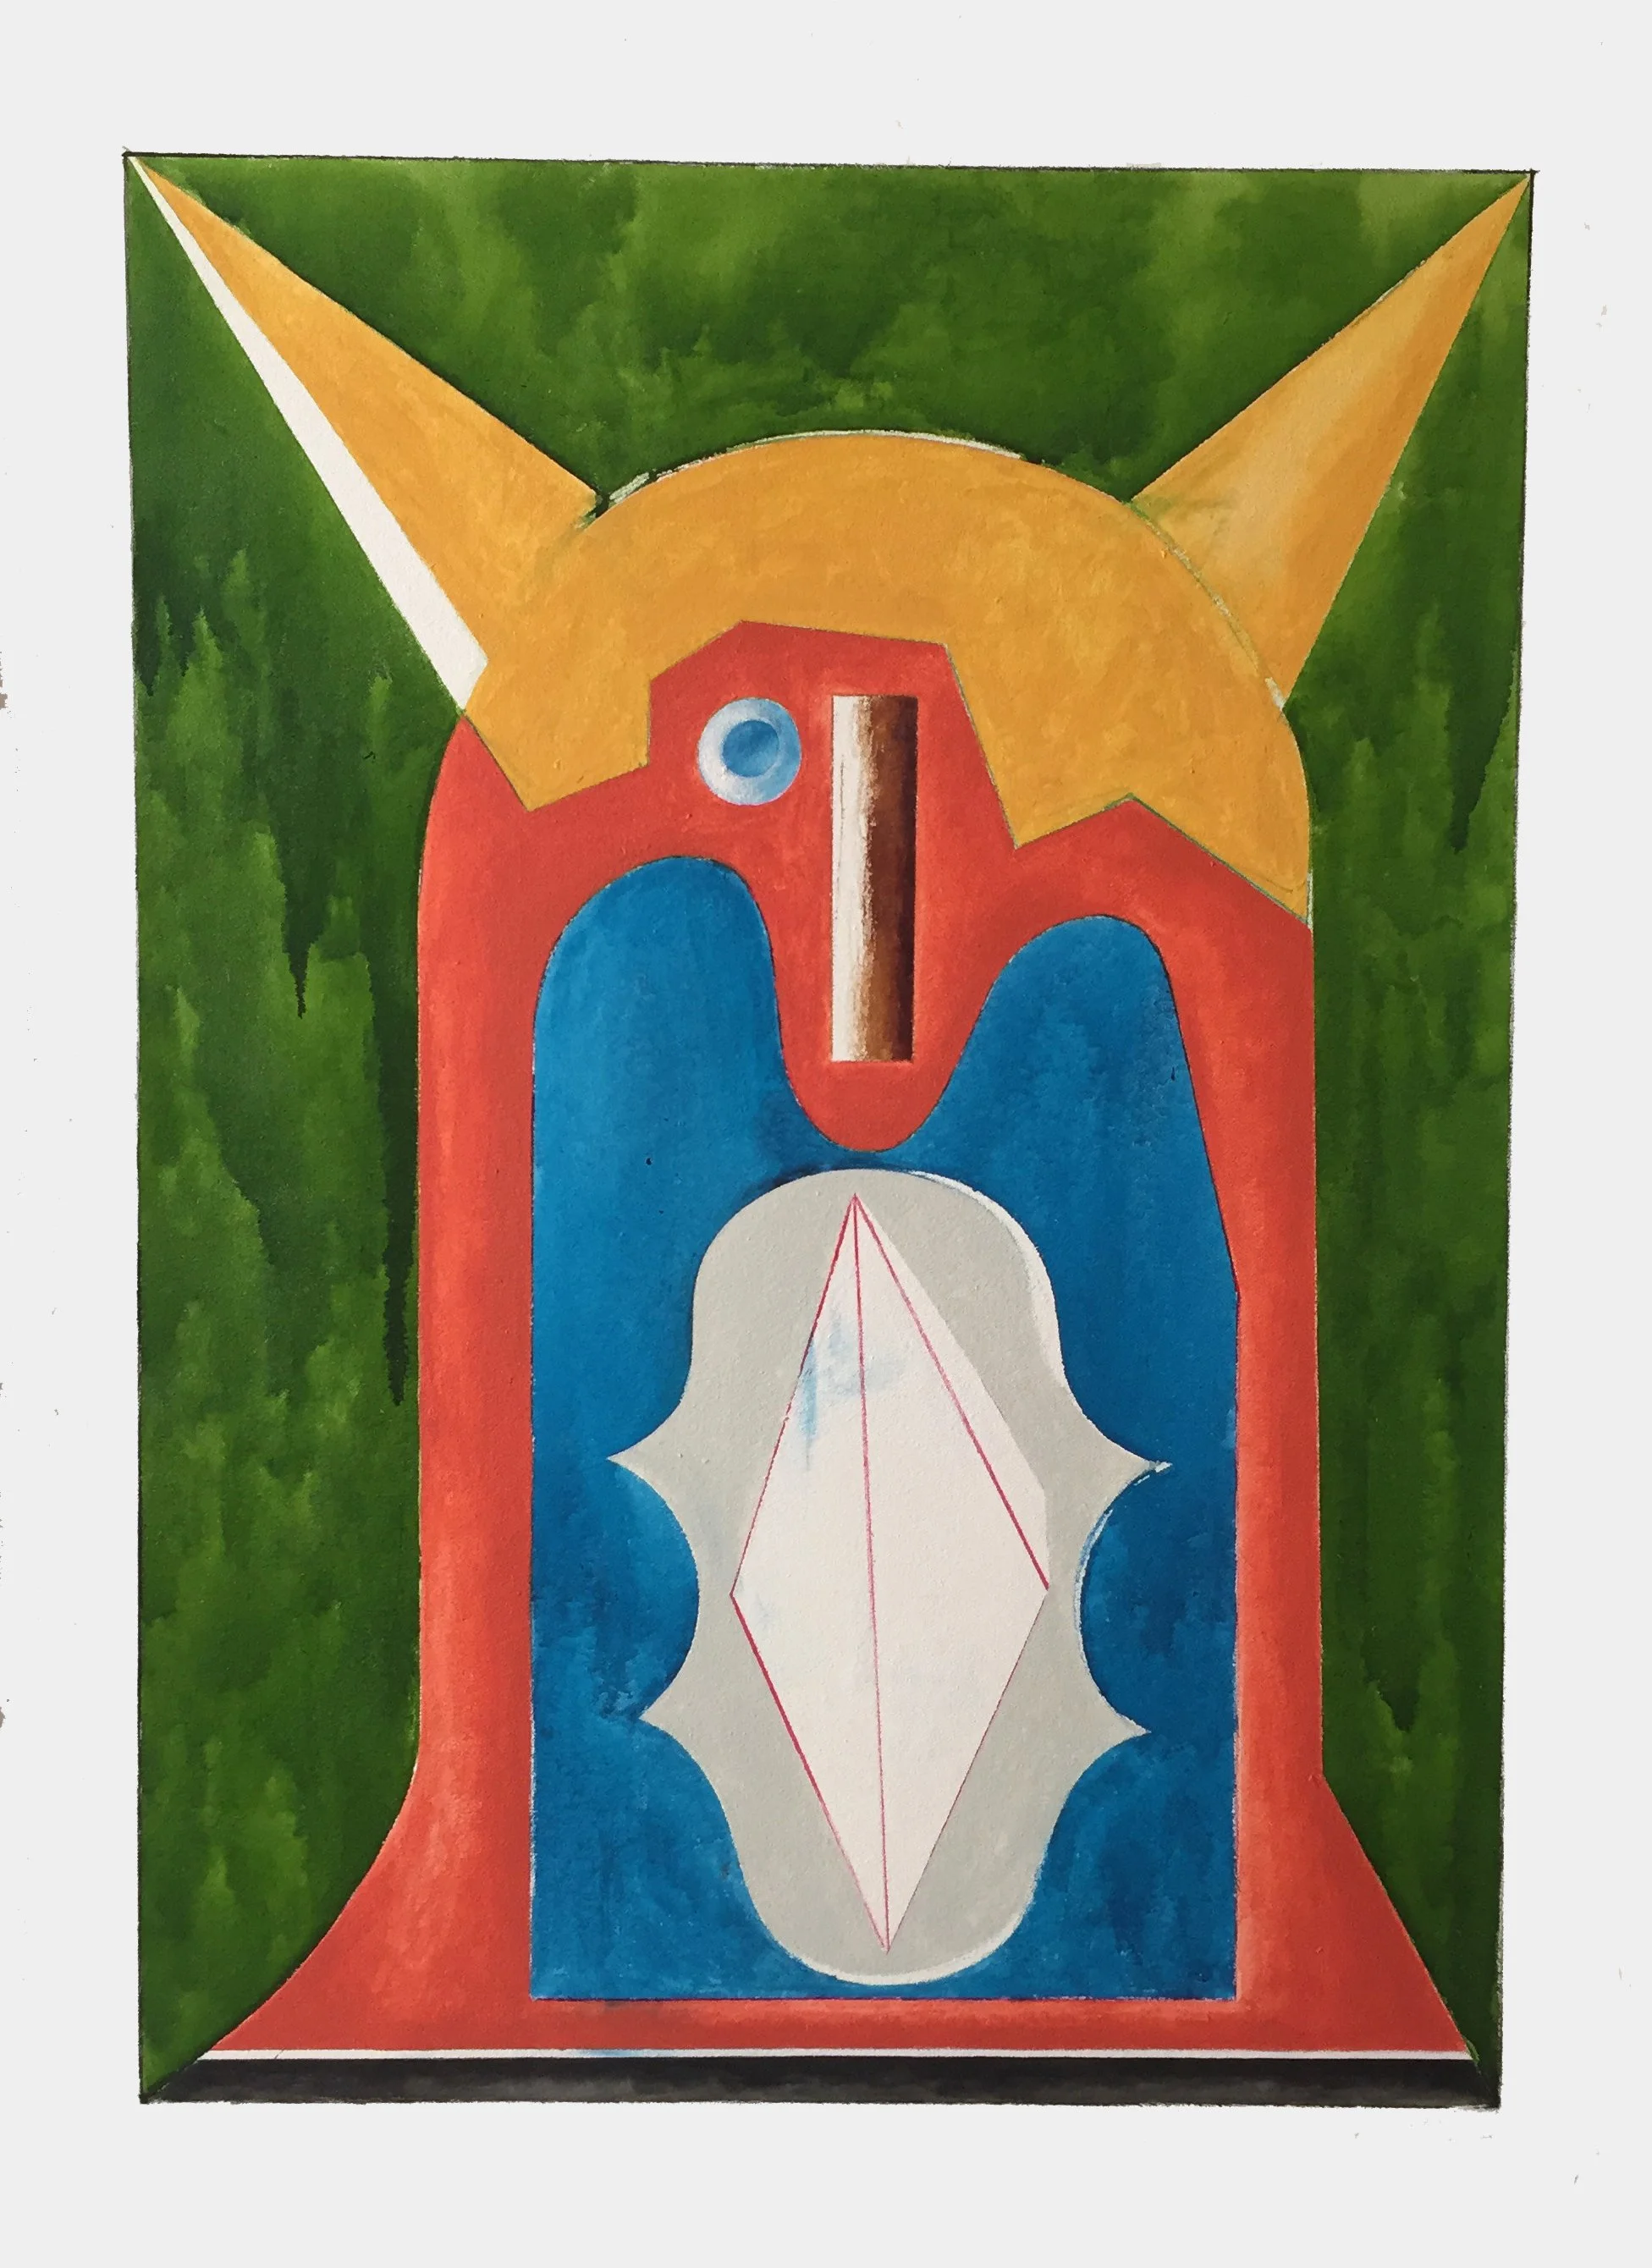
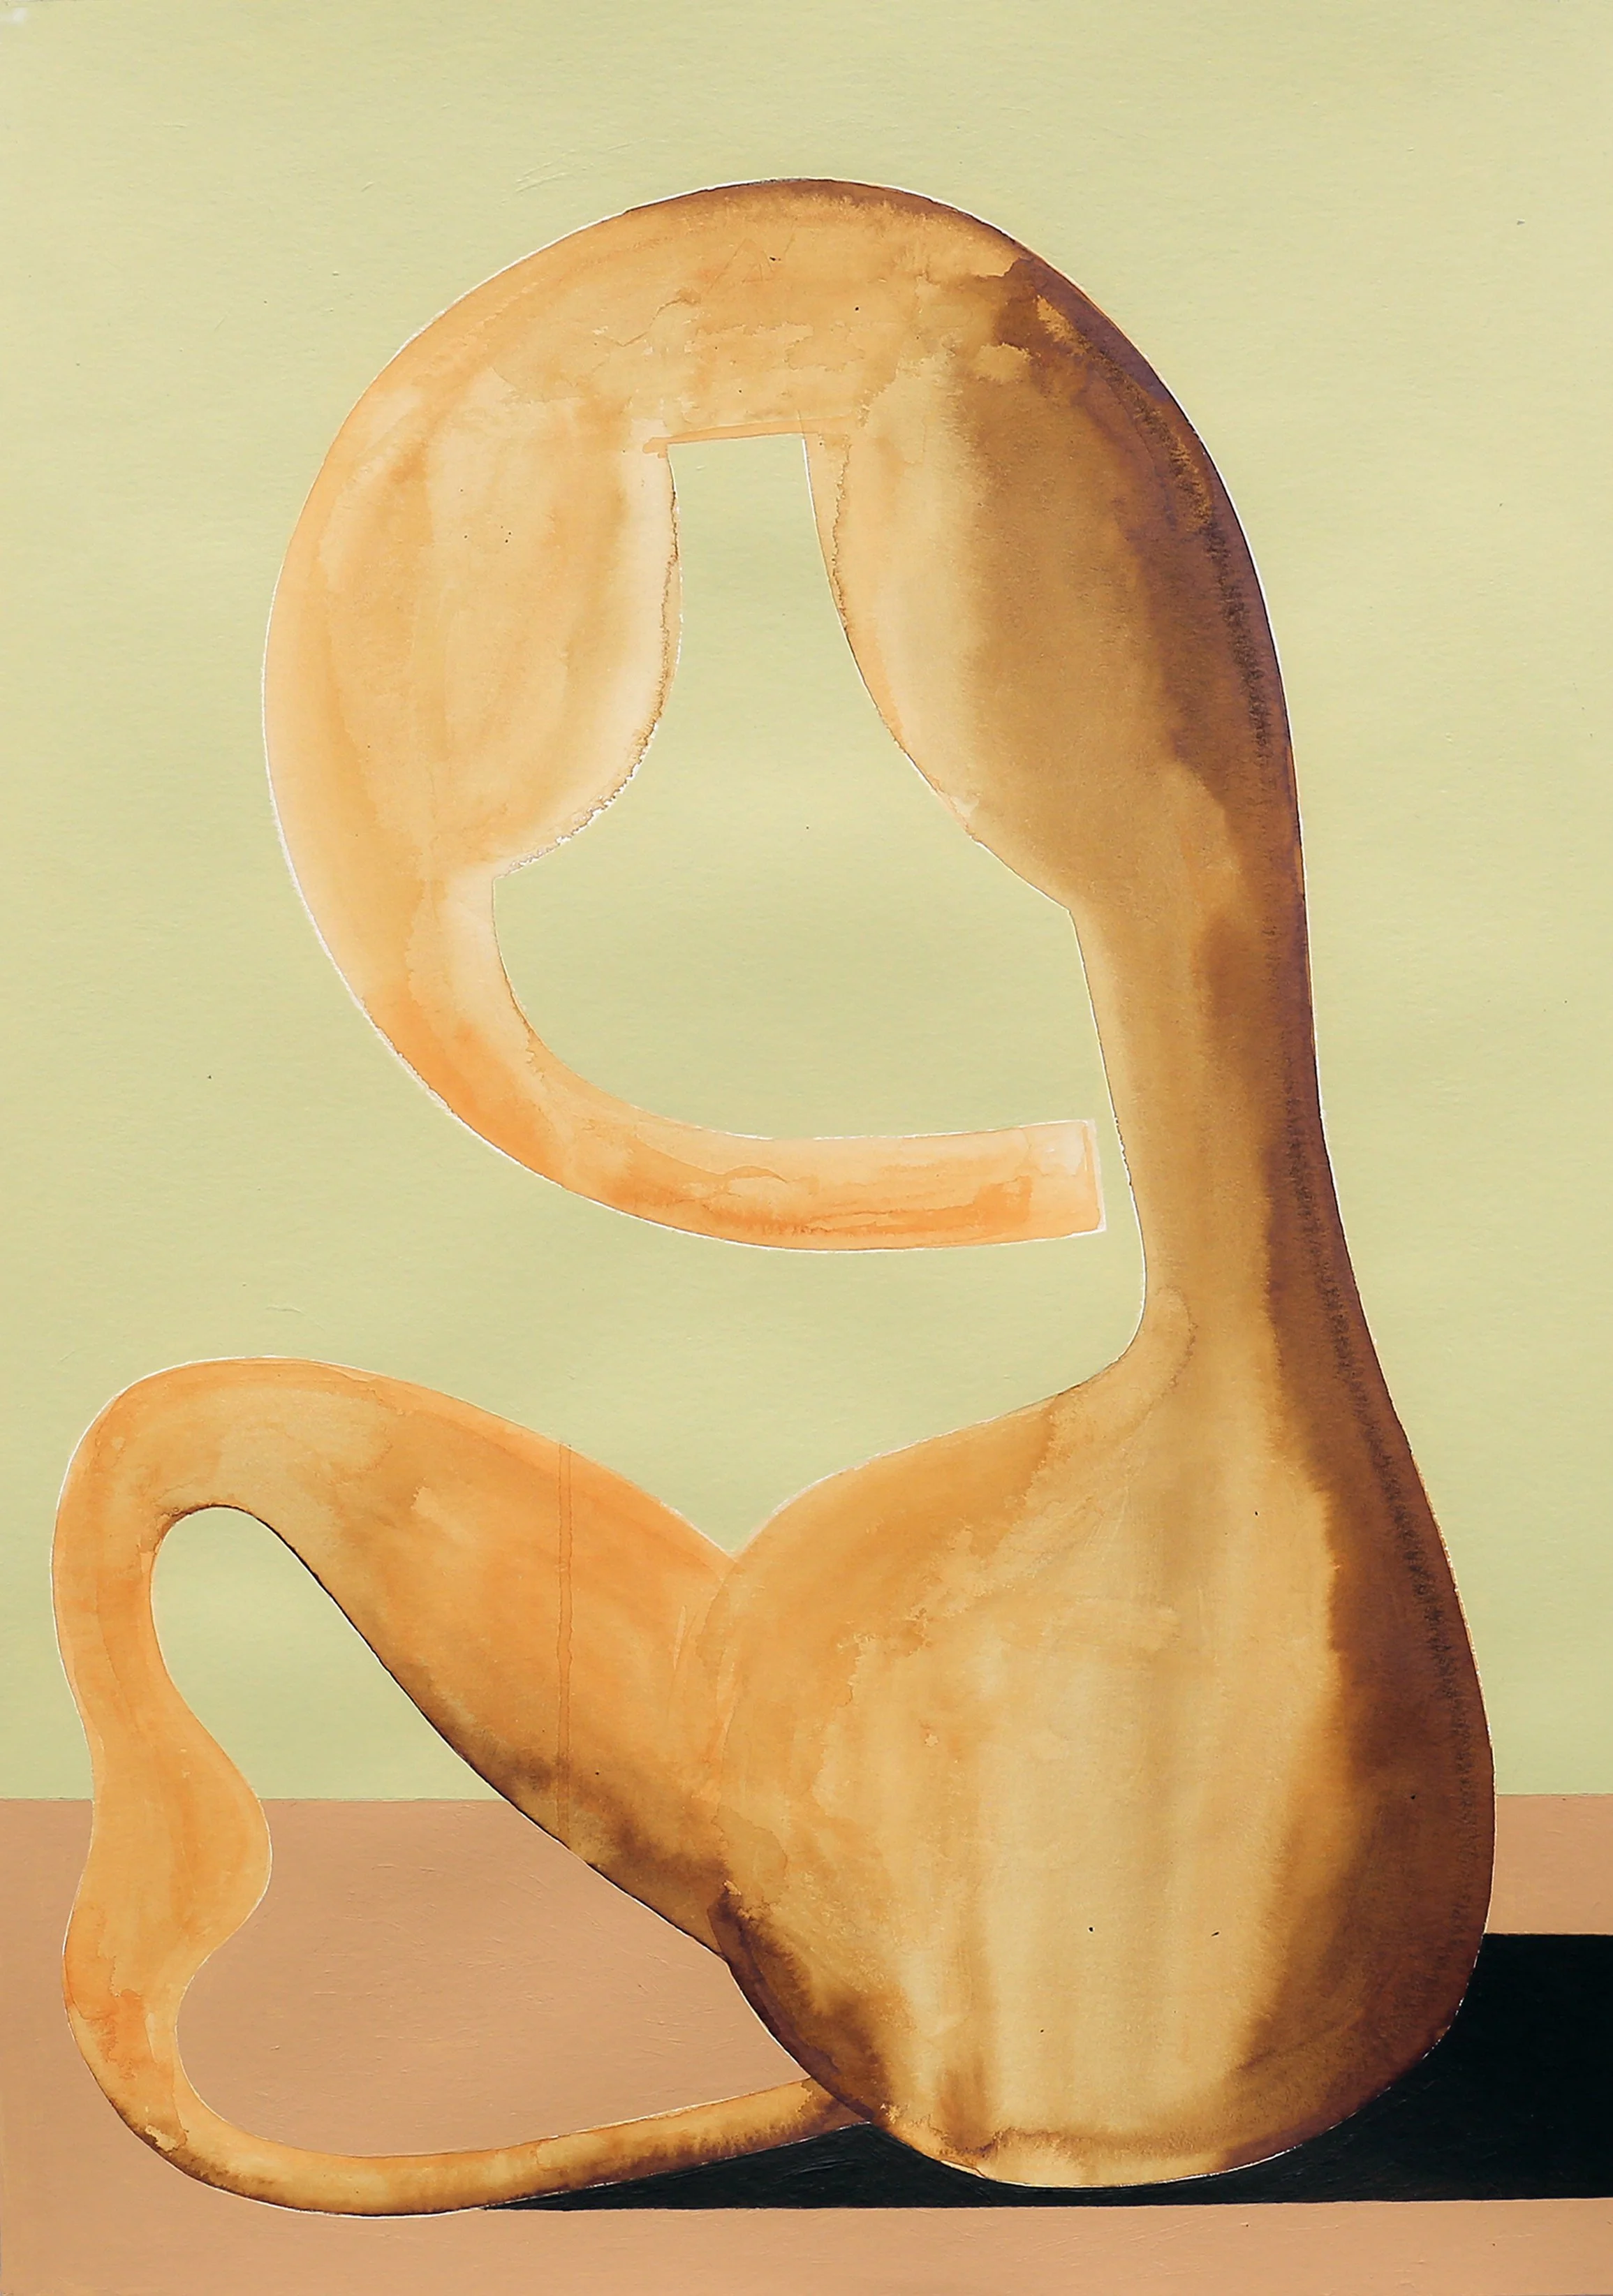
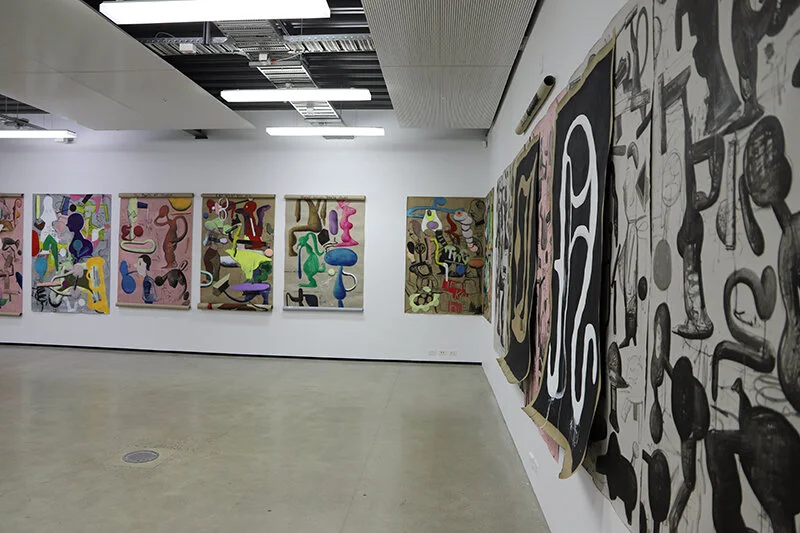
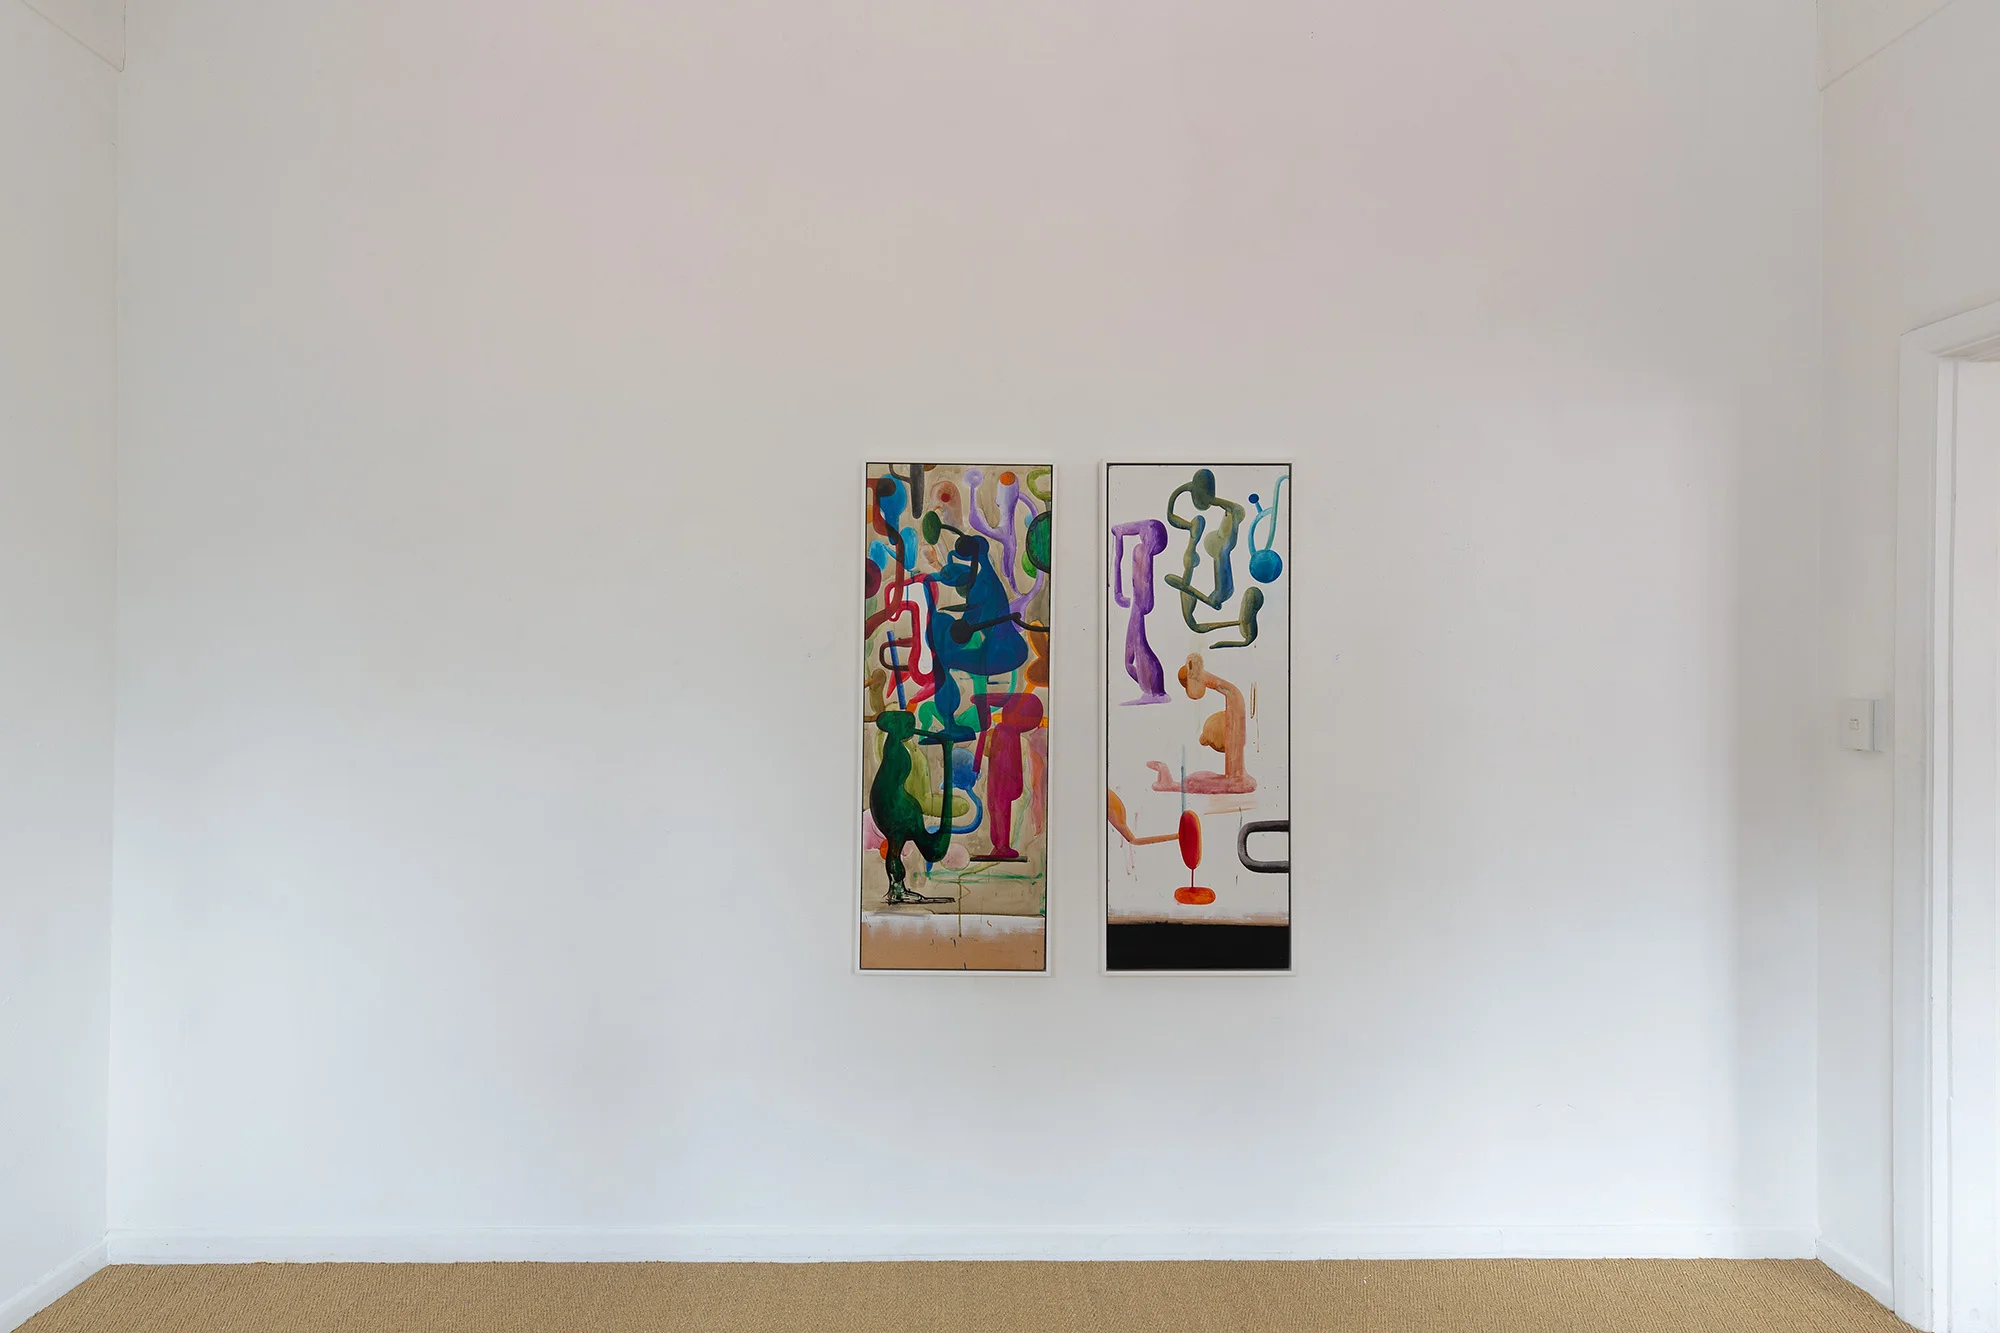
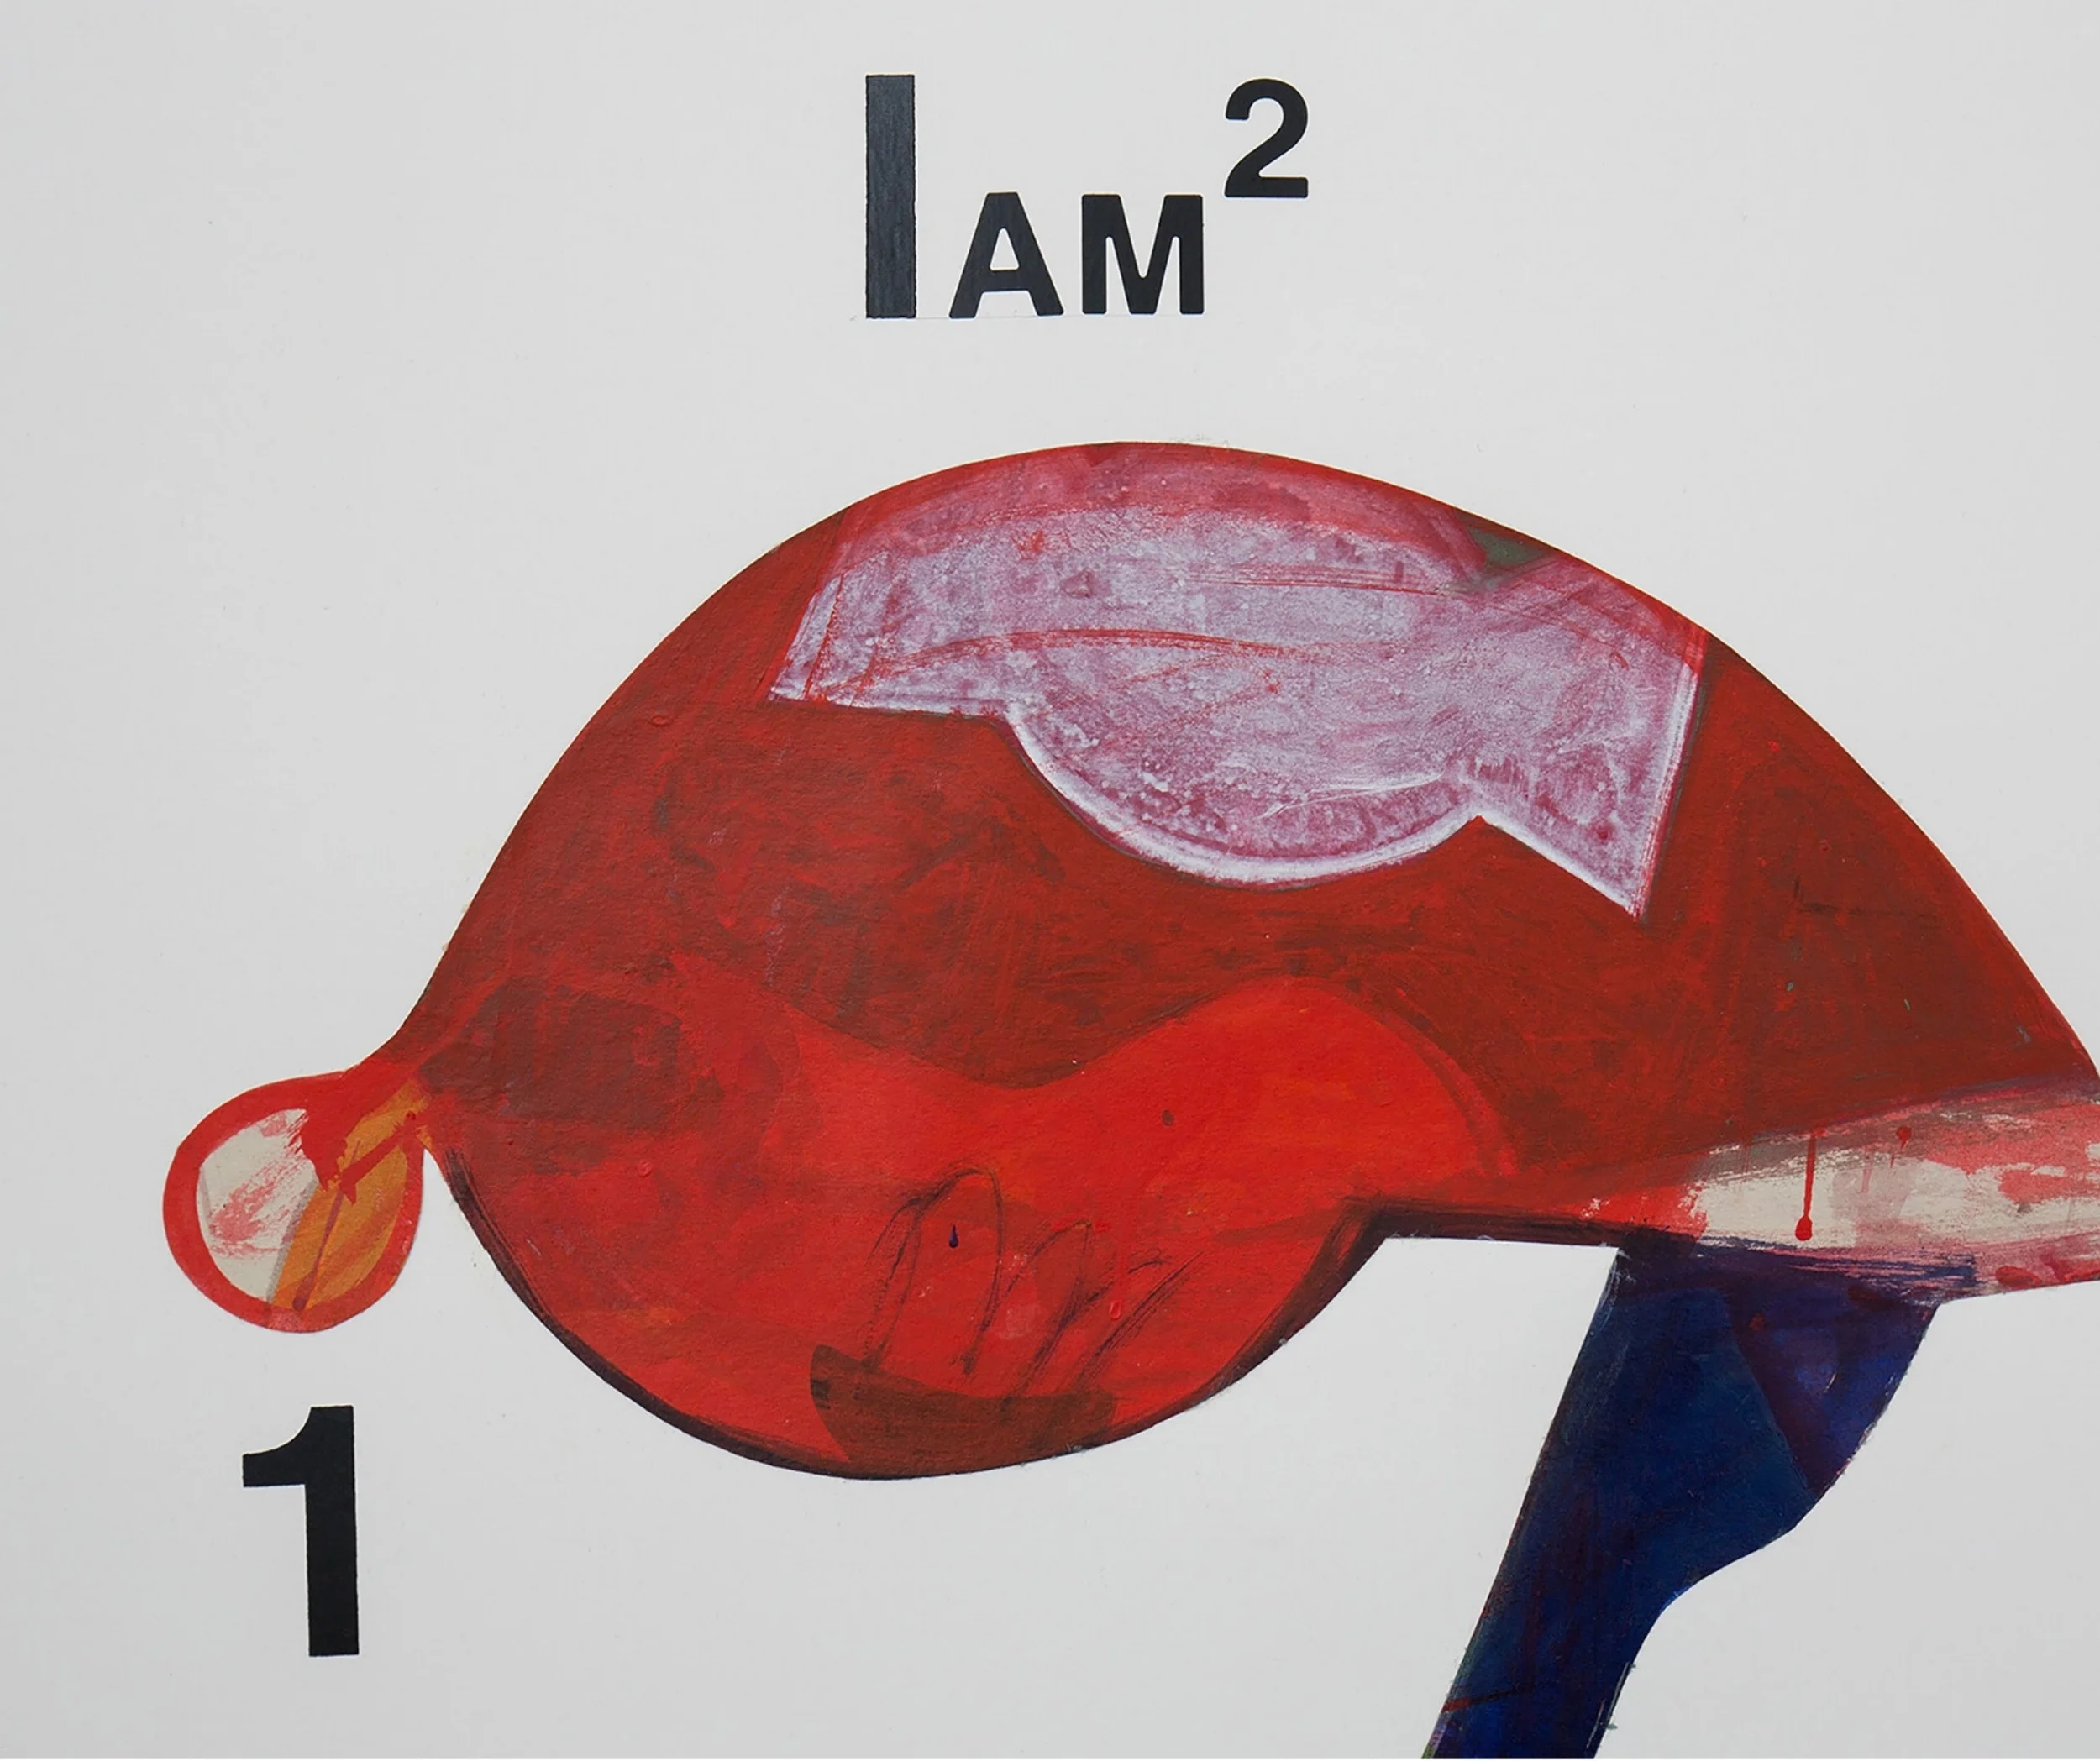
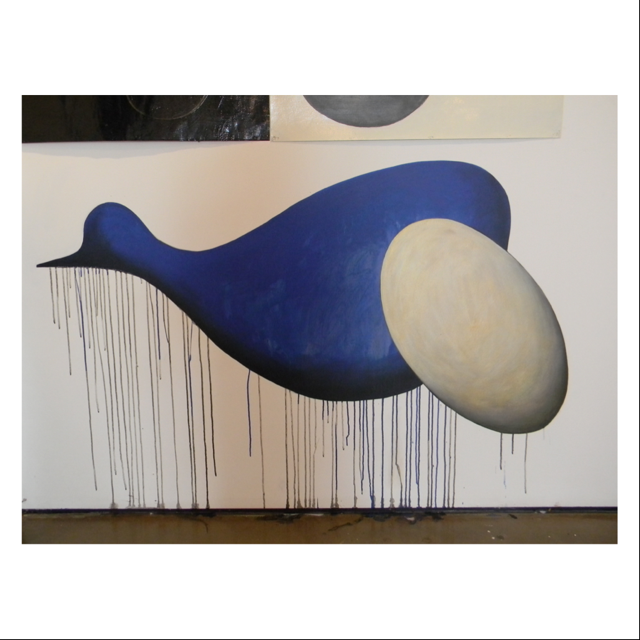
Since the early 1990’s, I have been engaged in an obsessive quest to transform animal and plant biology into a chimera of sorts by cross breeding invented forms with an assortment of pop culture iconography. It’s a strange alchemy of nature and social evolution, as if created inside a Petri dish of the imagination. Not particularly about surrealism as such, but a desire to make ‘real’ forms that may have existed in our past or in the possible distant future. Ancient/Futuristic specimens.

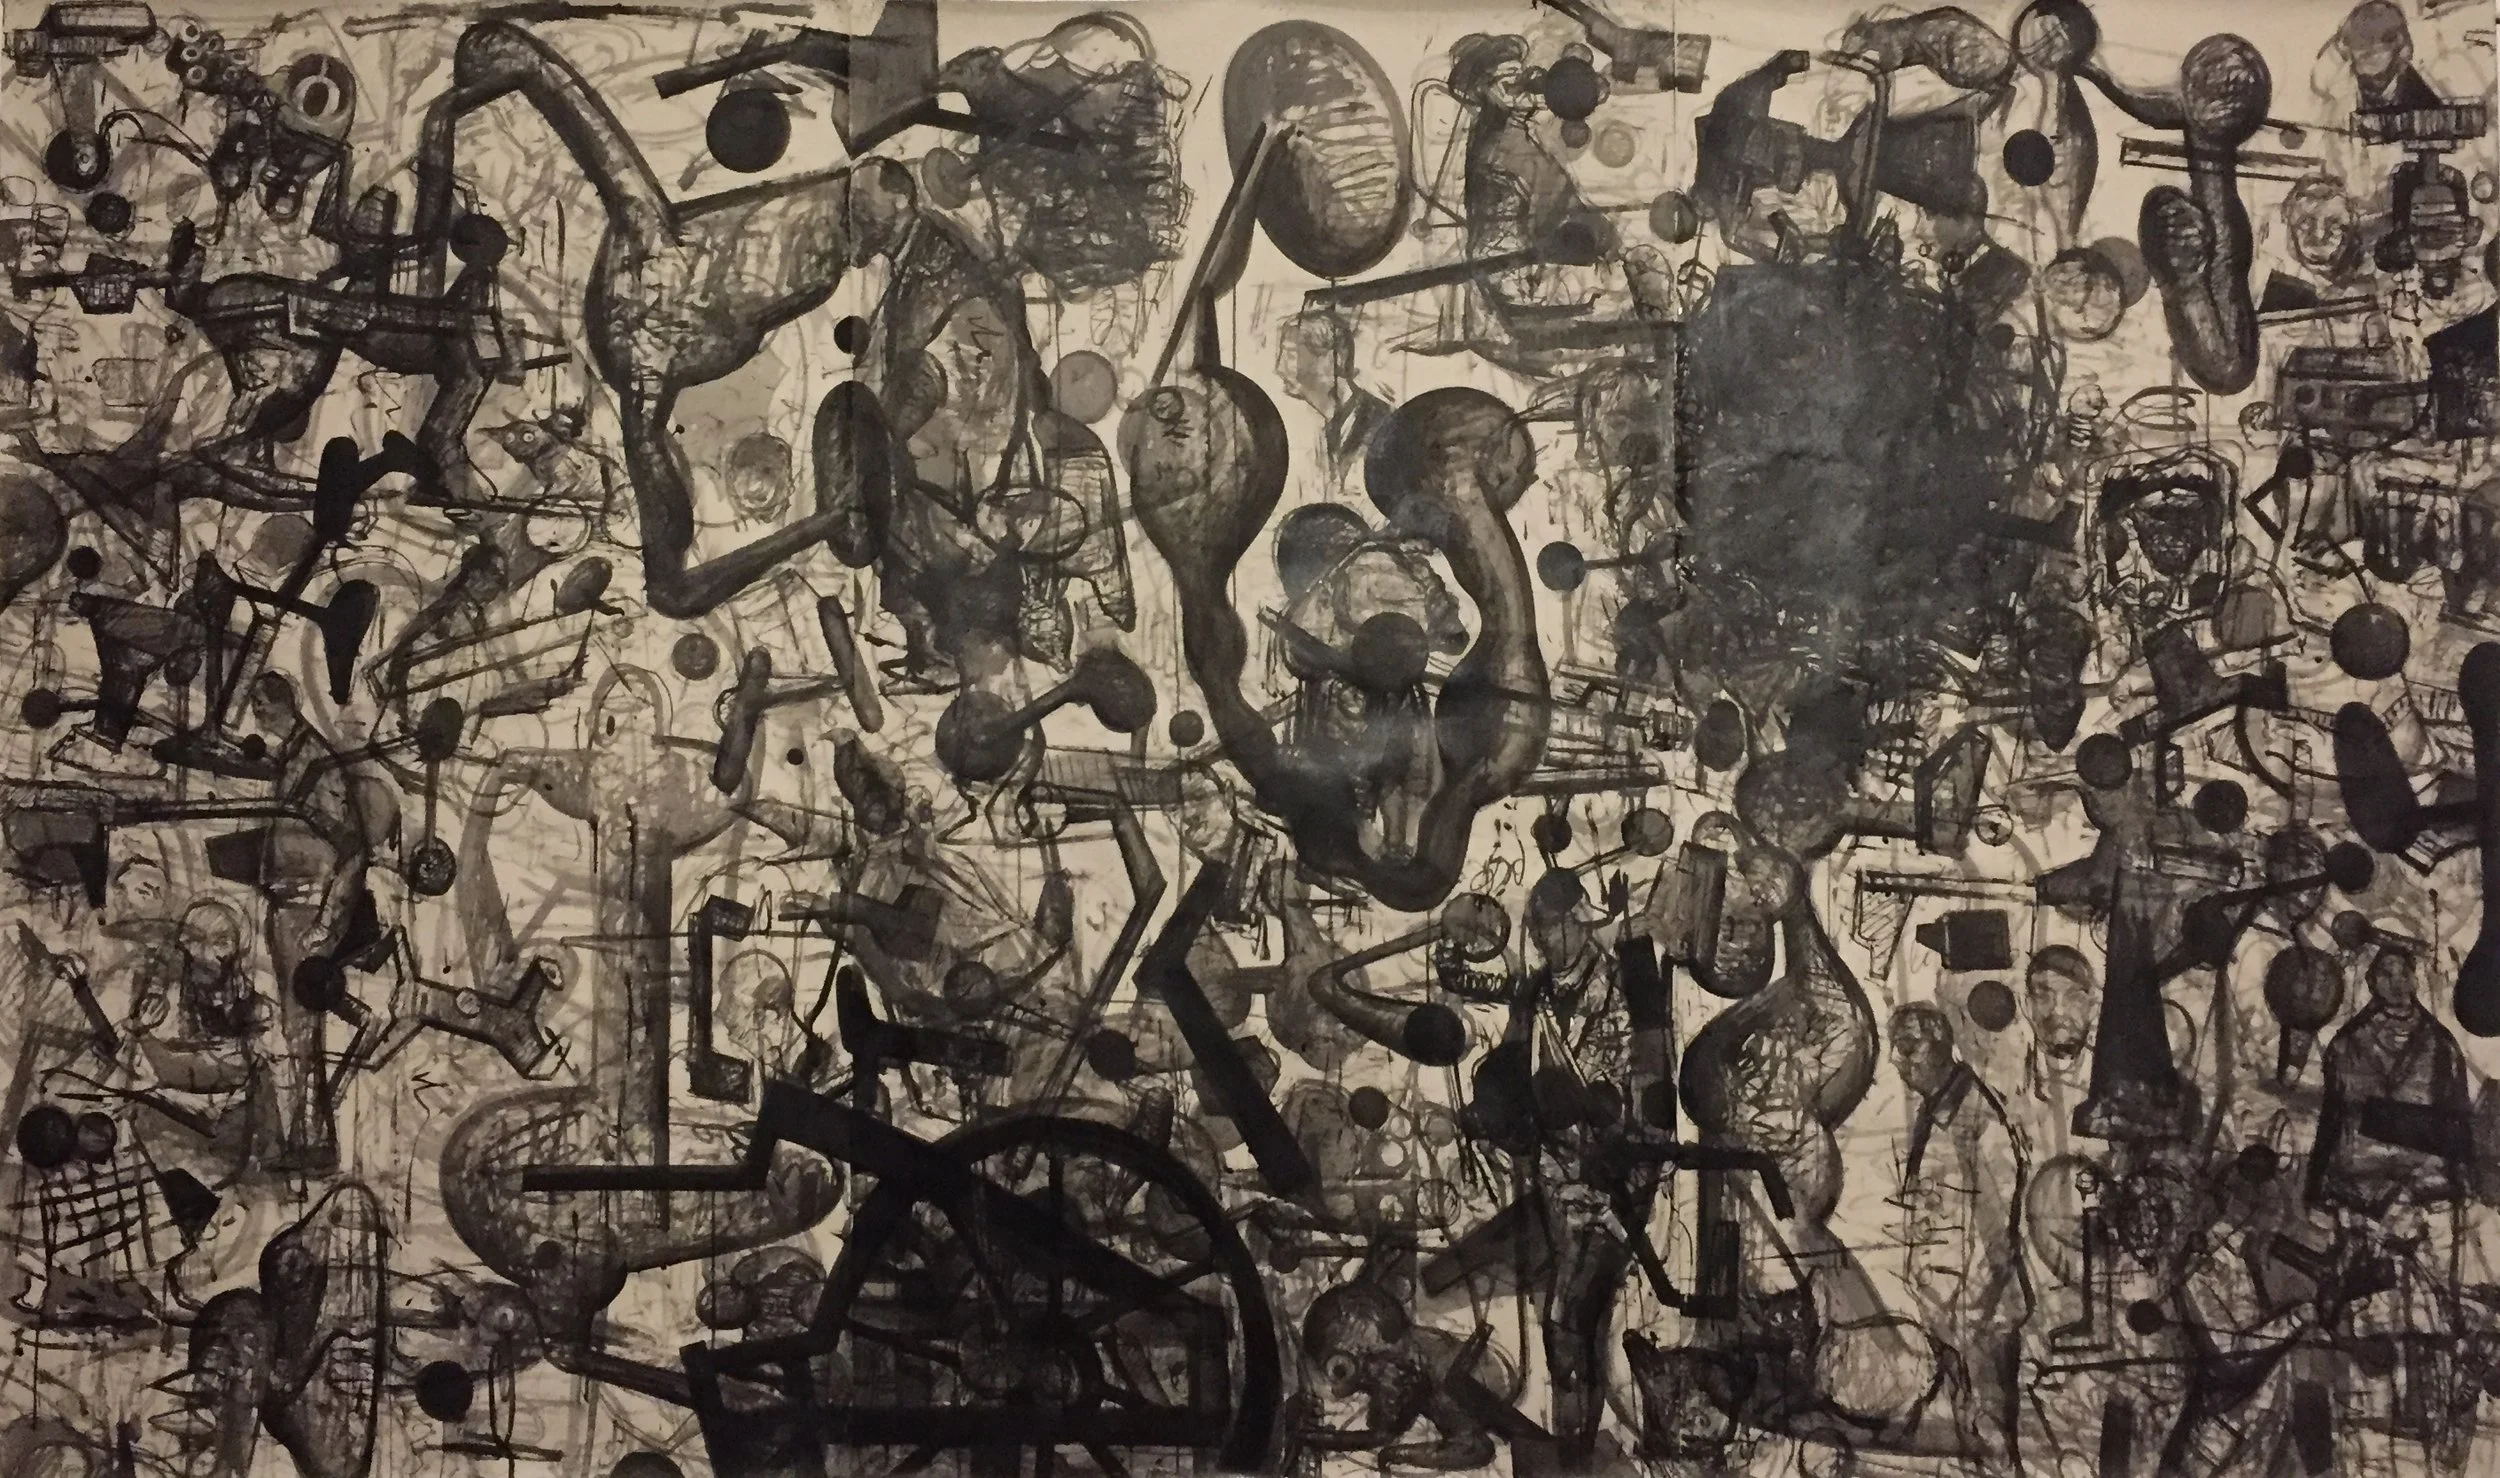
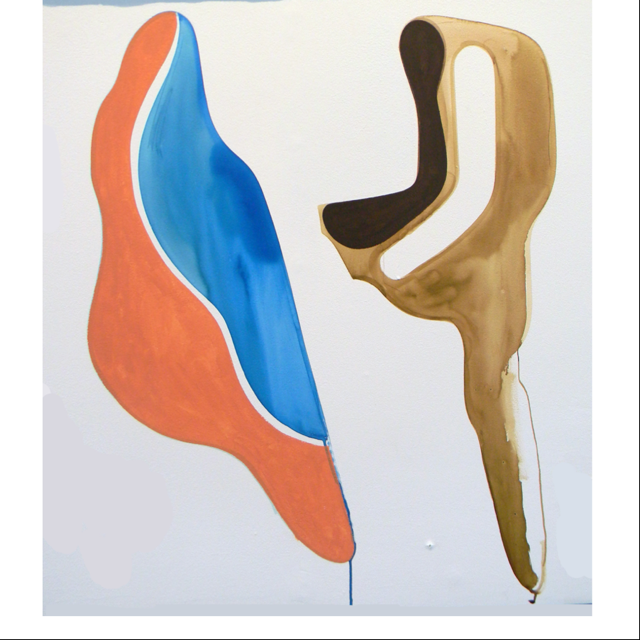
In terms of my process with these drawings, I begin each work from the inside. There are no preliminary pencil outlines. Using a dripping wet brush of colour and water, I slowly work to the outside edge. The white of the paper is activated as space, and my controlled contour is crucial to the overall physicality of the shapes. Like a fluid-immersed alchemist, I attempt to bring these creatures to life. It’s less Shelley’s Frankenstein and slightly more Mr Magoo’s plasma fully formed. Within a pictorial context however, this body of work places an overt emphasis on the use of line. In this instance though, the line is essentially invisible. Its existence resides in the subtle collision of two opposing spaces. A figure/ground relationship nuanced.

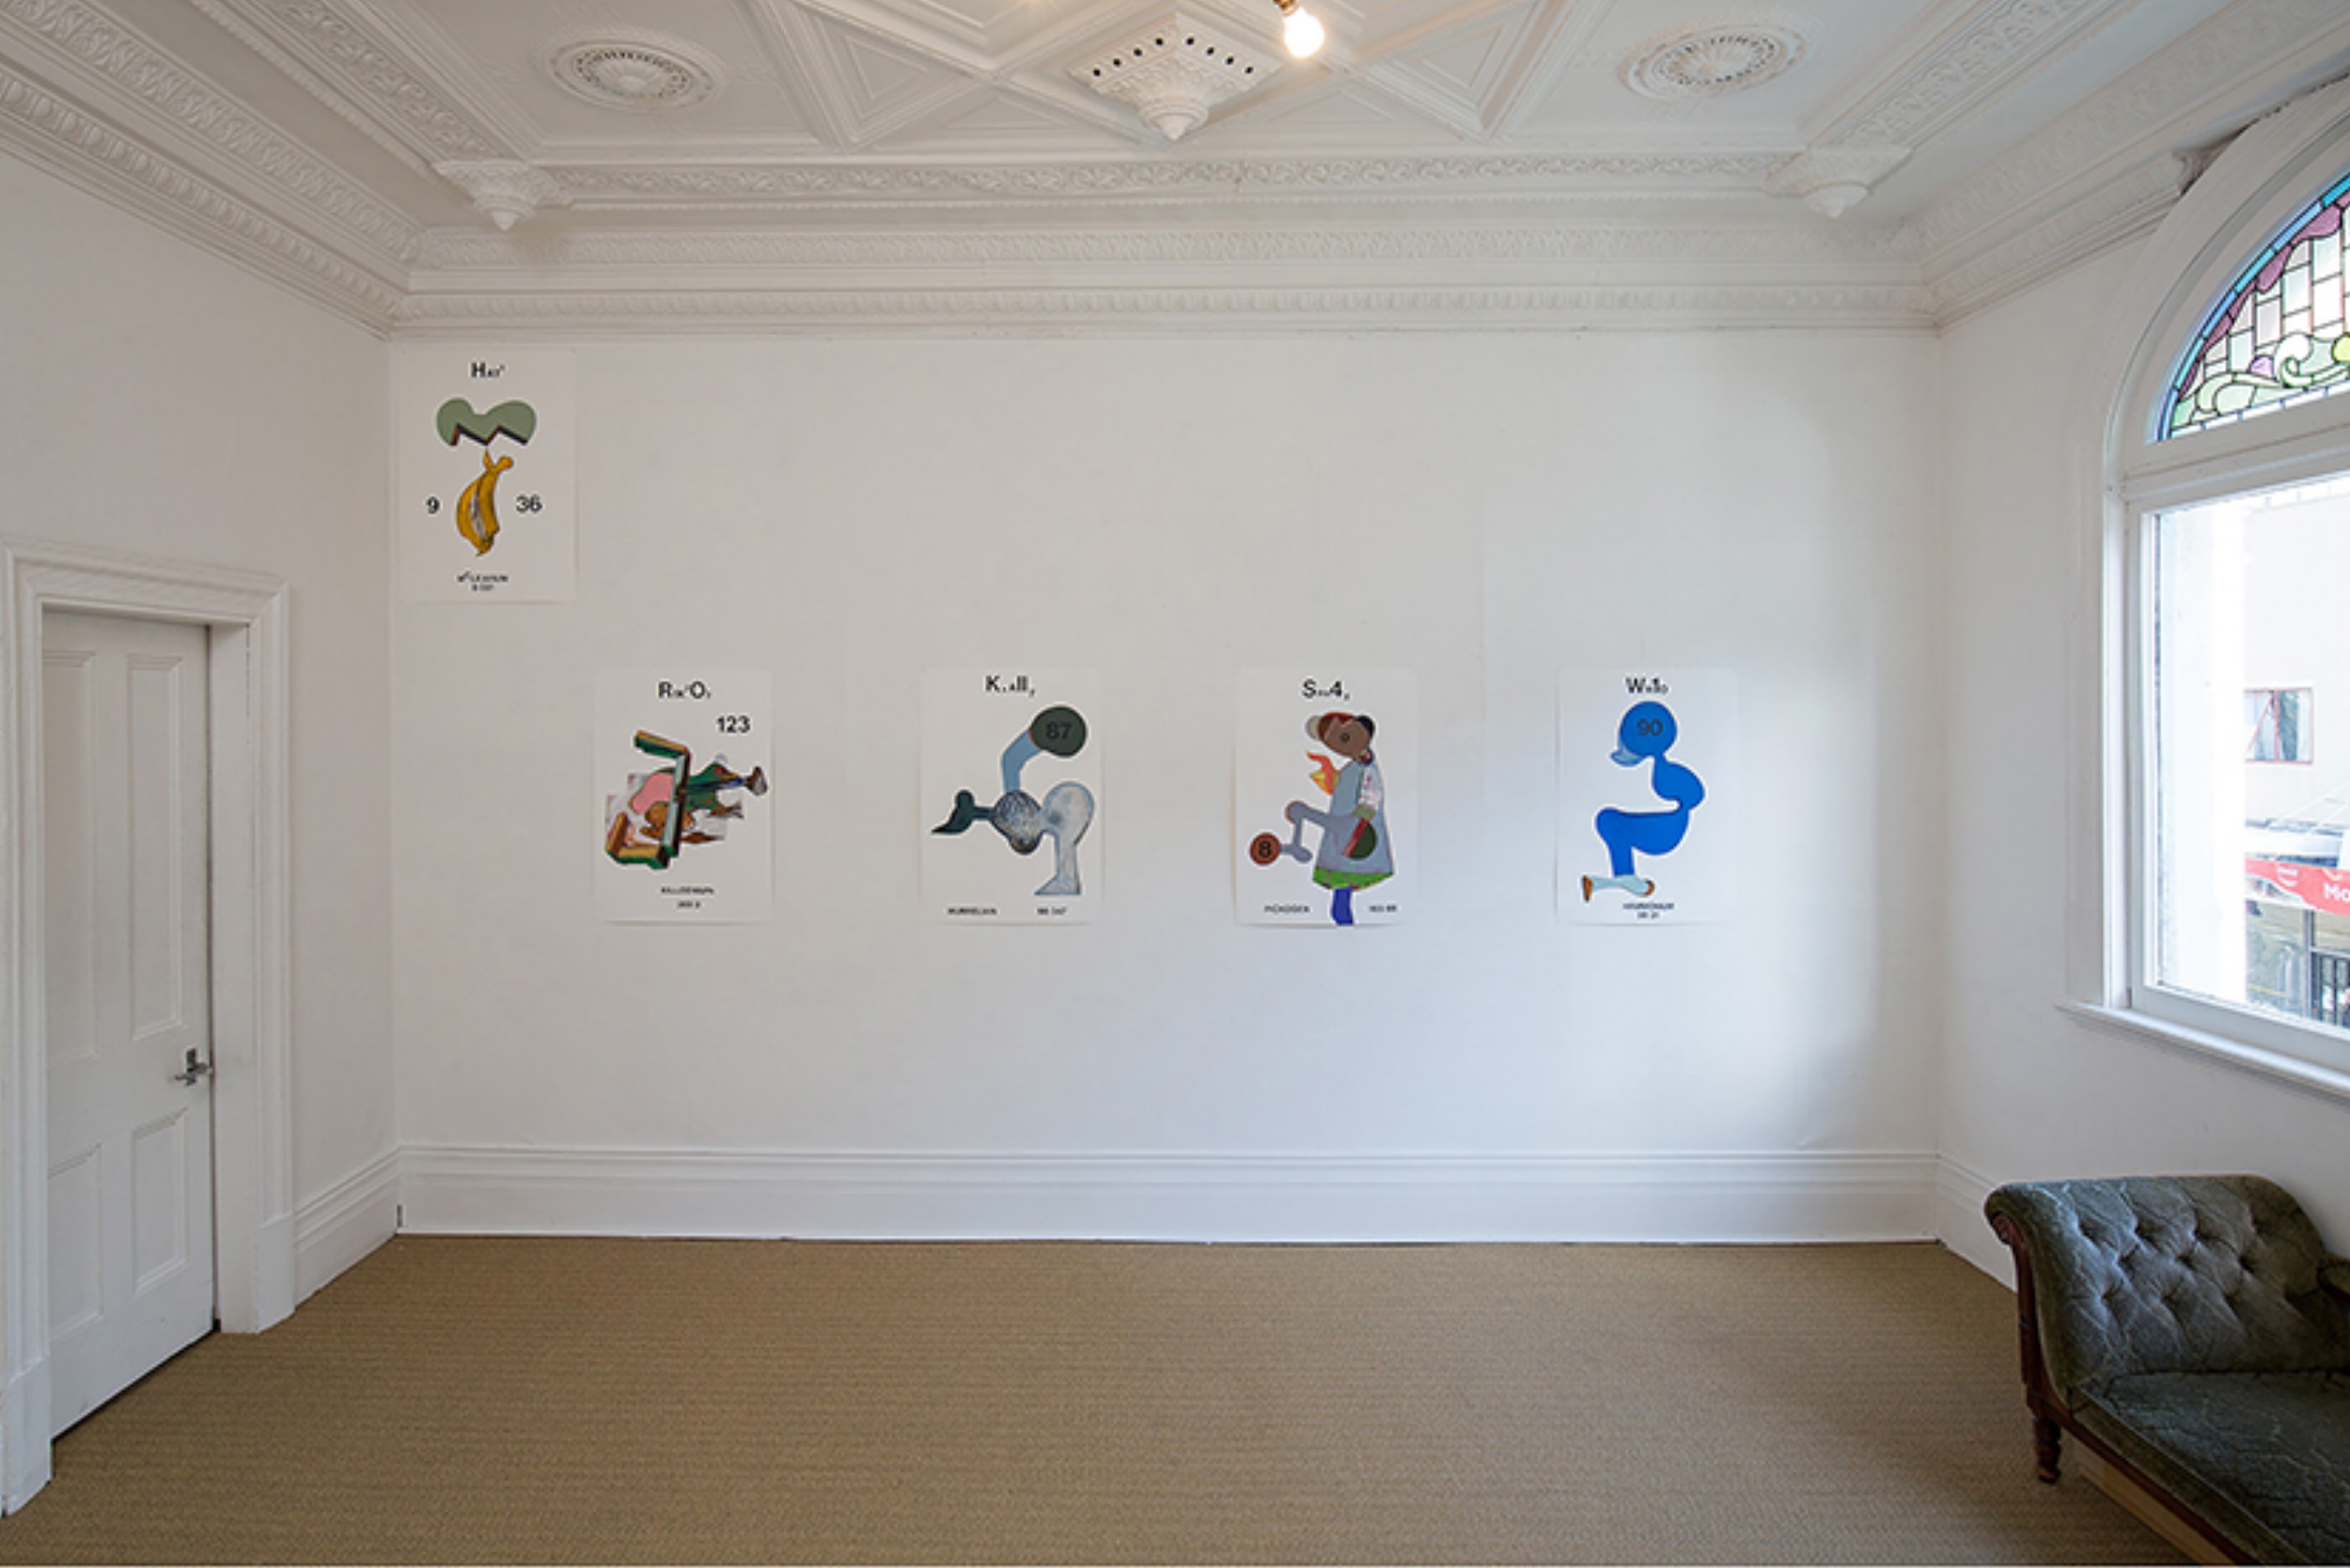
These studies were then WeTransferred to Brisbane. I gave no exact specifications for how the collaborative transformative stage should be undertaken. Jarred Wright independently selected certain works he considered would suit his processes. The 3D pieces in this show are, by association, interpretive responses. They are not copies or a replication of the drawings. They take on a new life of their own through the methodology of glass blowing and Jarred’s informed decision-making. Feedback is given at various stages, and at times implemented into new works. Shamrock and Teak on the walls of this gallery are a specific example of that collaborative engagement.

This is the 2nd iteration of this collaboration. The first occurred in 2021 and was also exhibited here at the Jonathan Smart Gallery on Buchan Street.

 Installation View

Installation View

 Installation View

Installation View

 Installation View

Installation View

 Installation View

Installation View

 Installation View

Installation View

 Installation View

Installation View

 Installation View

Installation View

   Untitled Study    (ink & acrylic on paper) 700 x 500mm, 2023.

Untitled Study (ink & acrylic on paper) 700 x 500mm, 2023.

   Untitled Study    (ink & acrylic on paper) 770 x 560mm, 2023. Private Collection.

Untitled Study (ink & acrylic on paper) 770 x 560mm, 2023. Private Collection.

   Untitled Study    (ink & acrylic on paper) 210 x 150mm, 2023.

Untitled Study (ink & acrylic on paper) 210 x 150mm, 2023.

   Untitled Study    (ink & acrylic on paper) 595 x 420mm, 2023. Private collection.

Untitled Study (ink & acrylic on paper) 595 x 420mm, 2023. Private collection.

   Untitled Study    (ink & acrylic on paper) 295 x 210mm, 2019.

Untitled Study (ink & acrylic on paper) 295 x 210mm, 2019.

   Untitled Study    (ink & acrylic on paper) 295 x 210mm, 2019.

Untitled Study (ink & acrylic on paper) 295 x 210mm, 2019.

   Untitled Study    (ink & acrylic on paper) 770 x 560mm, 2023.

Untitled Study (ink & acrylic on paper) 770 x 560mm, 2023.

   Untitled Study    (ink & acrylic on paper) 595 x 420mm, 2023. Private Collection.

Untitled Study (ink & acrylic on paper) 595 x 420mm, 2023. Private Collection.

   Untitled Study    (ink & acrylic on paper) 420 x 300mm, 2023.

Untitled Study (ink & acrylic on paper) 420 x 300mm, 2023.

   Untitled Study    (ink & acrylic on paper) 420 x 300mm, 2023.

Untitled Study (ink & acrylic on paper) 420 x 300mm, 2023.

   Untitled Study    (ink & acrylic on paper) 420 x 300mm, 2023.

Untitled Study (ink & acrylic on paper) 420 x 300mm, 2023.

   Untitled Study    (ink & acrylic on paper) 420 x 300mm, 2023.

Untitled Study (ink & acrylic on paper) 420 x 300mm, 2023.

   Untitled Study    (ink & acrylic on paper) 420 x 300mm, 2023. Private Collection.

Untitled Study (ink & acrylic on paper) 420 x 300mm, 2023. Private Collection.

   Untitled Study    (ink & acrylic on paper) 420 x 300mm, 2023.

Untitled Study (ink & acrylic on paper) 420 x 300mm, 2023.

   Sienna  , (hand-blown borosilicate glass) made in collaboration with Jarred Wright, 2023. Private Collection.

Sienna, (hand-blown borosilicate glass) made in collaboration with Jarred Wright, 2023. Private Collection.

   Candy  , (hand-blown borosilicate glass) made in collaboration with Jarred Wright, 2023. Private Collection.

Candy, (hand-blown borosilicate glass) made in collaboration with Jarred Wright, 2023. Private Collection.

   Lavender  , (hand-blown borosilicate glass) made in collaboration with Jarred Wright, 2023. Private Collection.

Lavender, (hand-blown borosilicate glass) made in collaboration with Jarred Wright, 2023. Private Collection.

   Indigo   (hand-blown borosilicate glass) made in collaboration with Jarred Wright, 2023.

Indigo (hand-blown borosilicate glass) made in collaboration with Jarred Wright, 2023.

   Crystal   (hand-blown borosilicate glass) made in collaboration with Jarred Wright, 2023. Private Collection.

Crystal (hand-blown borosilicate glass) made in collaboration with Jarred Wright, 2023. Private Collection.

   Turquoise   (hand-blown borosilicate glass) made in collaboration with Jarred Wright, 2023.

Turquoise (hand-blown borosilicate glass) made in collaboration with Jarred Wright, 2023.

Ilam Campus Gallery, Christchurch (2023)

Pedagogical Lobster.

An exhibition in collaboration with Brenda Nightingale. Ilam Campus Gallery, University of Canterbury, Christchurch. 15 March - 6 April 2023.

Exhibition catalogue accompanied the show. Essay by Mark Braunias and photographic documentation of the exhibition.

IMG_4714.jpg
IMG_4715.jpg
IMG_4719.jpg
IMG_4723.jpg
IMG_4874.png
IMG_4732.jpg
fog.jpg
IMG_4614.jpg
IMG_4597.jpg
IMG_4862.png
IMG_4865.png
IMG_4612.jpg
IMG_4902.png
IMG_4604.jpg
IMG_4592.jpg
IMG_4910.png
IMG_4744.png
Poster Ilam 2023.png
Cover.jpg

Anna Miles Gallery, Auckland (2022)

Solo Exhibition: Subtract Abstract, Anna Miles Gallery, Auckland. 23 July -18 August, 2022.

  Exhibition catalogue  (Front page) Anna Miles Gallery, 2022.  Design by Sarah Caldwell. Photography by Samuel Hartnett.

Exhibition catalogue (Front page) Anna Miles Gallery, 2022.

Design by Sarah Caldwell. Photography by Samuel Hartnett.

  Exhibition catalogue  (Back page) Anna Miles Gallery, 2022. Design by Sarah Caldwell. Photography by Samuel Hartnett.

Exhibition catalogue (Back page) Anna Miles Gallery, 2022.
Design by Sarah Caldwell. Photography by Samuel Hartnett.

                 Install documentation. Photograph by Samuel Hartnett

Install documentation. Photograph by Samuel Hartnett

                Install documentation. Photograph by Samuel Hartnett

Install documentation. Photograph by Samuel Hartnett

                    Install documentation. Photograph by Samuel Hartnett

Install documentation. Photograph by Samuel Hartnett

                   Install documentation.

Install documentation.

 Install documentation.

Install documentation.

                Install documentation. Photograph by Samuel Hartnett

Install documentation. Photograph by Samuel Hartnett

 Install documentation.

Install documentation.

 Install documentation.

Install documentation.

 Install documentation.

Install documentation.

 Install documentation. Photograph by Samuel Hartnett

Install documentation. Photograph by Samuel Hartnett

  Untitled  (acrylic on paper) 415 x 295mm, 2021. Collection of  The Arts House Trust , 2002.

Untitled (acrylic on paper) 415 x 295mm, 2021. Collection of The Arts House Trust, 2002.

  Untitled  (acrylic on paper) 415 x 295mm, 2021.

Untitled (acrylic on paper) 415 x 295mm, 2021.

  Untitled  (acrylic on paper) 415 x 295mm, 2021. Private collection, Auckland.

Untitled (acrylic on paper) 415 x 295mm, 2021. Private collection, Auckland.

  Untitled  (acrylic on paper) 415 x 295mm, 2021.

Untitled (acrylic on paper) 415 x 295mm, 2021.

  Untitled  (acrylic on paper) 415 x 295mm, 2022. Private collection, Auckland.

Untitled (acrylic on paper) 415 x 295mm, 2022. Private collection, Auckland.

Jonathan Smart Gallery, Christchurch (2021)

Solo exhibition: In Search Of The Saccharine Underground. Jonathan Smart Gallery, Christchurch. October 8 -20 November, 2021

 Front Entrance

Front Entrance

 Main front wall

Main front wall

 Far right of front space

Far right of front space

 Front right hand space

Front right hand space

 Back Gallery

Back Gallery

 A4 size canvases

A4 size canvases

 Glass works made in Collaboration with  glass-maker Jarred Wright.

Glass works made in Collaboration with glass-maker Jarred Wright.

 Back Gallery space

Back Gallery space

 Quilts made in collaboration with quilt-maker Brenda Ronowicz

Quilts made in collaboration with quilt-maker Brenda Ronowicz

  Quartet   (acrylic on paper) 2000mm x 1250mm, 2021.

Quartet (acrylic on paper) 2000mm x 1250mm, 2021.

  Calypso Funk ( acrylic on paper) 2000mm x 1250mm, 2021 (Private Collection).

Calypso Funk (acrylic on paper) 2000mm x 1250mm, 2021 (Private Collection).

  Doozer Rock  (acrylic on canvas) 1800mm x 1160mm, 2021 (Private Collection).

Doozer Rock (acrylic on canvas) 1800mm x 1160mm, 2021 (Private Collection).

  Puss G  (acrylic on canvas) 2030mm x 1230mm, 2021 (private collection)

Puss G (acrylic on canvas) 2030mm x 1230mm, 2021 (private collection)

  The Tooby Ooby Quartet  (acrylic on canvas) 20o0mm x 1220mm, 2021.

The Tooby Ooby Quartet (acrylic on canvas) 20o0mm x 1220mm, 2021.

  Wiggle Waggle Town Plan   (acrylic on canvas) 1780mm x 970mm, 2021 (private collection)

Wiggle Waggle Town Plan (acrylic on canvas) 1780mm x 970mm, 2021 (private collection)

 Guru Sabba Sibby  (acrylic on canvas) 1800mm x 940mm, 2021.

Guru Sabba Sibby (acrylic on canvas) 1800mm x 940mm, 2021.

  Bitter Loon  (acrylic on canvas) 345mm x 245mm 2021

Bitter Loon (acrylic on canvas) 345mm x 245mm 2021

  Lounge Muse  (acrylic on canvas) 345mm x 245mm 2021 (private collection).

Lounge Muse (acrylic on canvas) 345mm x 245mm 2021 (private collection).

  Sabba Sibby  (acrylic on canvas) 345mm x 245mm 2021

Sabba Sibby (acrylic on canvas) 345mm x 245mm 2021

  Lime  (quilted fabric object) 1100x 700mm 2021. Made in collaboration with quilt-maker Brenda Ronowicz (private collection).

Lime (quilted fabric object) 1100x 700mm 2021. Made in collaboration with quilt-maker Brenda Ronowicz (private collection).

  Pinky  (quilted fabric object) 1100x 700mm 2021. Made in collaboration with quilt-maker Brenda Ronowicz.

Pinky (quilted fabric object) 1100x 700mm 2021. Made in collaboration with quilt-maker Brenda Ronowicz.

  Gloop  (hand-blown borosilicate glass) Height 260mm 2021. Made in collaboration with glass-blower Jarred Wright (private collection).

Gloop (hand-blown borosilicate glass) Height 260mm 2021. Made in collaboration with glass-blower Jarred Wright (private collection).

  Pink Dream  (hand-blown borosilicate glass) Height 260mm 2021. Made in collaboration with glass-blower Jarred Wright (private collection).

Pink Dream (hand-blown borosilicate glass) Height 260mm 2021. Made in collaboration with glass-blower Jarred Wright (private collection).

 Cover of exhibition catalogue/manifesto.

Cover of exhibition catalogue/manifesto.

 Intro page

Intro page

 Page 1

Page 1

 Page 2

Page 2

 Review of the exhibition by Warren Feeney. Art Beat magazine, November 2021.

Review of the exhibition by Warren Feeney. Art Beat magazine, November 2021.

Dunedin School Of Art, Dunedin (2019)

Solo Exhibition: Working On A Guru. Dunedin School of Art Gallery, Dunedin.

14 October -1 November, 2019.

A project based installation as part of an 8 week artist in Residency completed at the Dunedin School of Art.

 Invite Poster.

Invite Poster.

 Studio set-up at the Dunedin School of Art in September, 2019.

Studio set-up at the Dunedin School of Art in September, 2019.

 Initial installation of some of the work produced during the 8 week residency in the Dunedin Art School Gallery, October 2019.

Initial installation of some of the work produced during the 8 week residency in the Dunedin Art School Gallery, October 2019.

 Install with ready-made (student painting trolley) positioned as a ‘stand-in’ for a church pulpit.

Install with ready-made (student painting trolley) positioned as a ‘stand-in’ for a church pulpit.

 Installation arrangement.

Installation arrangement.

 Installation arrangement.

Installation arrangement.

 Documentation of install.

Documentation of install.

 Documentation of install.

Documentation of install.

 A series of scrolls with banner proclamations.

A series of scrolls with banner proclamations.

 Detail from a scroll work on paper.

Detail from a scroll work on paper.

 Documentation of install.

Documentation of install.

 A series of drawings attached on top of each directly onto the gallery wall alluding to the pages of a dysfunctional ‘sacred’ book.

A series of drawings attached on top of each directly onto the gallery wall alluding to the pages of a dysfunctional ‘sacred’ book.

 Detail of ‘wall book’.

Detail of ‘wall book’.

 Detail of ‘wall book’.

Detail of ‘wall book’.

 Detail of ‘wall book’.

Detail of ‘wall book’.

 The view from the ‘pulpit’ to the The Last Judgement wall.

The view from the ‘pulpit’ to the The Last Judgement wall.

 Install design incorporating fixed wall attachments as part of the composition.

Install design incorporating fixed wall attachments as part of the composition.

 A series of typed written obituaries of ‘The grateful dead’. Hand-coloured and altered photographs of notable humans in the history of western civilization arranged in alphabetical/encyclopedic order.

A series of typed written obituaries of ‘The grateful dead’. Hand-coloured and altered photographs of notable humans in the history of western civilization arranged in alphabetical/encyclopedic order.

 Detail from the pages of  “The grateful dead”.

Detail from the pages of “The grateful dead”.

 Documentation of install.

Documentation of install.

 Documentation of install.

Documentation of install.

 The Last Supper / Testament  wall.

The Last Supper / Testament wall.

 Details from ‘The Last Supper’.

Details from ‘The Last Supper’.

 Detail from ‘The Last Supper’.

Detail from ‘The Last Supper’.

 ‘Otago Daily Times’ review and description of the exhibition by James Dignan, October 31, 2019.

‘Otago Daily Times’ review and description of the exhibition by James Dignan, October 31, 2019.

Anna Miles Gallery, Auckland (2018)

Group Exhibition: The Ocelot Dominion. Anna Miles Gallery, Auckland. 25-11-2018 - 22-12-2018

Photography: Samuel Harnett

Other artists in the show included: Allan McDonald, Matthew McIntyre-Wilson, Vita Cochran, Peter Hawkesby, Richard Stratton, Cat Fooks, and Octavia Cook.

https://www.instagram.com/justin.m.paton/?hl=en

 L/R:  Mark Braunias (two quilts) and Allan McDonald (two photographs).

L/R: Mark Braunias (two quilts) and Allan McDonald (two photographs).

 Quilted fabrics.

Quilted fabrics.

  Splonje  (quilted fabric) in collaboration with quilt-maker Brenda Ronowicz, 2050mm x 1260mm, 2018.

Splonje (quilted fabric) in collaboration with quilt-maker Brenda Ronowicz, 2050mm x 1260mm, 2018.

  Splonje   Detail (quilted fabric) in collaboration with quilt-maker Brenda Ronowicz, 2018

Splonje Detail (quilted fabric) in collaboration with quilt-maker Brenda Ronowicz, 2018

  Splonje  Detail (quilted fabric) in collaboration with quilt-maker Brenda Ronowicz, 2018.

Splonje Detail (quilted fabric) in collaboration with quilt-maker Brenda Ronowicz, 2018.

  Splonje  Detail  (quilted fabric) in collaboration with quilt-maker Brenda Ronowicz, 2018.

Splonje Detail (quilted fabric) in collaboration with quilt-maker Brenda Ronowicz, 2018.

  Ronod   (quilted fabric) in collaboration with quilt-maker Brenda Ronowicz, 2090mm x 1300mm, 2018.

Ronod (quilted fabric) in collaboration with quilt-maker Brenda Ronowicz, 2090mm x 1300mm, 2018.

  Ronod   Detail (quilted fabric) in collaboration with quilt-maker Brenda Ronowicz, 2018.

Ronod Detail (quilted fabric) in collaboration with quilt-maker Brenda Ronowicz, 2018.

  Ronod   Detail (quilted fabric) in collaboration with quilt-maker Brenda Ronowicz, 2018.

Ronod Detail (quilted fabric) in collaboration with quilt-maker Brenda Ronowicz, 2018.

  Ronod   Detail  (quilted fabric) in collaboration with quilt-maker Brenda Ronowicz, 2018.

Ronod Detail (quilted fabric) in collaboration with quilt-maker Brenda Ronowicz, 2018.

  Ronod   Detail  (quilted fabric) in collaboration with quilt-maker Brenda Ronowicz, 2018.

Ronod Detail (quilted fabric) in collaboration with quilt-maker Brenda Ronowicz, 2018.

McLeavey Gallery, Wellington (2018)

Solo Exhibition: Evolutional Mongrel. McLeavey Gallery, Wellington. November 14 - 8 December 2018

Photography: Russell Kleyn

McLeavey invite 2018 b.jpg
 l/R:  Studies towards the Evolutional Mongrel I and II  .  Main wall:  Evolutional Mongrel .

l/R: Studies towards the Evolutional Mongrel I and II . Main wall: Evolutional Mongrel.

  Evolutional Mongrel  (ink, acrylic and collage on board) Triptych. 1700mm x 2900mm 2017-18.

Evolutional Mongrel (ink, acrylic and collage on board) Triptych. 1700mm x 2900mm 2017-18.

  Evolutional Mongrel   (Detail).

Evolutional Mongrel (Detail).

  Evolutional Mongrel.  (Detail)

Evolutional Mongrel. (Detail)

 L/R :  The Mongrel Comedian  and  The Mongrel Critic.  Opposite wall:  Kunstler Pods  and  Dissolve.

L/R : The Mongrel Comedian and The Mongrel Critic. Opposite wall: Kunstler Pods and Dissolve.

  The Mongrel Comedian  (ink, acrylic and collage on board) 320mm x 230mm 2018.

The Mongrel Comedian (ink, acrylic and collage on board) 320mm x 230mm 2018.

 L/R:  Kunstler Pods  (ink, acrylic and collage on board) 1260mm x 475mm 2017.  Dissolve  (ink and acrylic on board) 795mm x 240mm 2018.

L/R: Kunstler Pods (ink, acrylic and collage on board) 1260mm x 475mm 2017. Dissolve (ink and acrylic on board) 795mm x 240mm 2018.

  Kunstler Pods  (detail).

Kunstler Pods (detail).

 Installation shot of the link between rooms.

Installation shot of the link between rooms.

 L/R:  Fluido Mammalia I  and  Fluido Mammalia II .  (ink and acrylic on board) 1260mm x 475mm (each).

L/R: Fluido Mammalia I and Fluido Mammalia II . (ink and acrylic on board) 1260mm x 475mm (each).

 L/R:  Transference Systems I  (ink and acrylic on board) 1250mm x 650mm 2018.  Transference Systems II  (ink and acrylic on board) 935mm x 630mm 2018.

L/R: Transference Systems I (ink and acrylic on board) 1250mm x 650mm 2018. Transference Systems II (ink and acrylic on board) 935mm x 630mm 2018.

 Above door:  In A Period Of Transition  (ink and acrylic on board) 250mm x 345mm  2018.

Above door: In A Period Of Transition (ink and acrylic on board) 250mm x 345mm 2018.

 Above desk:   Ancestral Organisms  (ink and acrylic on board) 475mm x 750mm  2017-18.

Above desk: Ancestral Organisms (ink and acrylic on board) 475mm x 750mm 2017-18.

  3 Biomorphic Forms  (ink and acrylic on board) 345mm x 245mm 2018.

3 Biomorphic Forms (ink and acrylic on board) 345mm x 245mm 2018.

Jonathan Smart Gallery, Christchurch (2018)

Solo Exhibition: Son Of Mang. Jonathan Smart Gallery, Christchurch.

August 8 - 1 September, 2018

  Mang  (charcoal on paper) 2000mm x 3500mm  1997 (collection of Christchurch Art Gallery, 2002).

Mang (charcoal on paper) 2000mm x 3500mm 1997 (collection of Christchurch Art Gallery, 2002).

 Install of exhibition  Son Of Mang  , Jonathan Smart Gallery, Christchurch, August  2018.

Install of exhibition Son Of Mang , Jonathan Smart Gallery, Christchurch, August 2018.

 Install of exhibition  Son Of Mang  , Jonathan Smart Gallery, Christchurch, August 2018.

Install of exhibition Son Of Mang , Jonathan Smart Gallery, Christchurch, August 2018.

 Install of exhibition  Son Of Mang  , Jonathan Smart Gallery, Christchurch, August 2018.

Install of exhibition Son Of Mang , Jonathan Smart Gallery, Christchurch, August 2018.

 Install of exhibition  Son Of Mang  , Jonathan Smart Gallery, Christchurch, August 2018.

Install of exhibition Son Of Mang , Jonathan Smart Gallery, Christchurch, August 2018.

 Install of exhibition  Son Of Mang  , Jonathan Smart Gallery, Christchurch, August 2018.

Install of exhibition Son Of Mang , Jonathan Smart Gallery, Christchurch, August 2018.

 Install of exhibition  Son Of Mang  , Jonathan Smart Gallery, Christchurch, August 2018.

Install of exhibition Son Of Mang , Jonathan Smart Gallery, Christchurch, August 2018.

 Install of exhibition  Son Of Mang  , Jonathan Smart Gallery, Christchurch, August 2018.

Install of exhibition Son Of Mang , Jonathan Smart Gallery, Christchurch, August 2018.

  Tooth Head 1  (acrylic and ink on board) 1240mm x 940mm  2015-18

Tooth Head 1 (acrylic and ink on board) 1240mm x 940mm 2015-18

  Tooth Head 11  (acrylic and ink on board) 1240mm 940mm  2015-18

Tooth Head 11 (acrylic and ink on board) 1240mm 940mm 2015-18

  Tooth Head 111  (acrylic and enamel on board) 1240mm 940mm  2015-18

Tooth Head 111 (acrylic and enamel on board) 1240mm 940mm 2015-18

  Mub  (acrylic and ink on board) 350mm 250mm  2018

Mub (acrylic and ink on board) 350mm 250mm 2018

  Fade Out  (acrylic and ink on board) Diptych 1250mm 970mm  2018

Fade Out (acrylic and ink on board) Diptych 1250mm 970mm 2018

  Fade  (acrylic and ink on board) 350mm x 250mm  2018

Fade (acrylic and ink on board) 350mm x 250mm 2018

Anna Miles Gallery, Auckland (2018)

Solo Exhibition: Das Boot. Anna Miles Gallery, Auckland. April 15 - 11 May 2018

Photography: Samuel Harnett


invite.jpg
AMG_Braunias-poster_2-2.jpg
das1.jpg
das2.jpg
das3.jpg
das4.jpg
das11.jpg
das5.jpg
das7.jpg
das10.jpg
das6.jpg

Peter McLeavey Gallery, Wellington (2017)

Solo Exhibition: Elements. Peter McLeavey Gallery, Wellington. 21 June - 1 July 2017

A selection of works on paper from 2009 satirizing both compound chemical elements and well known personalities within the New Zealand Art World.

nz art elements invite.jpg
install13.jpeg
install3.jpg
install2.jpg
install5.jpg
install6.jpg
install9.jpg
install16.jpg
install10.jpg
install11.jpg
install12.jpg
install19.jpg
install15.jpg
install20.jpg
install17.jpg

Bath Street Gallery, Auckland (2016)

The Dogs Breakfast, Bath Street Gallery, Auckland 10 - 28 May, 2016.


Install 2.jpg
Install 3.jpg
Install 4.jpg
Install 5.jpg
Install 8.jpg
Install 9.jpg
Install 12.jpg
Install 11.jpg
Bath2.PNG
Bath.PNG

Peter McLeavey Gallery, Wellington (2015)

Solo Exhibition: Fuddy Duddy Cool. Peter McLeavey Gallery, Wellington. 7 October - 31 October    2015

fuddy duddy invite.jpg
image_1.jpg
444.jpg
mac g.jpg
mac g 2.jpg
mac g 3.jpg
mac g 4.jpg

Bath Street Gallery, Auckland (2015)

Solo Exhibition: Herbert Goon. Bath Street Gallery, Auckland. 13 June - 4 July  2015


                   Front of invite card.

                  Front of invite card.

herbert goon invite 3.jpg
2.jpg
4.jpg
5.jpg
7.jpg
8.jpg
9.jpg
10.jpg
 New Zealand Herald. T.J.McNamara, June 27, 2015.

New Zealand Herald. T.J.McNamara, June 27, 2015.

 Exhibition catalogue.

Exhibition catalogue.

New275.jpg
 Essay by Natalia Saegusa, 2015.

Essay by Natalia Saegusa, 2015.

 Exhibition catalogue documentation.

Exhibition catalogue documentation.

Jonathan Smart Gallery, Christchurch (2015)

Solo Exhibition: Anti-Groovy. Jonathan Smart Gallery, Christchurch. 12 May - 30 May  2015


                                          Exhibition Invite card

                                         Exhibition Invite card

3.jpg
image_5.jpg
image_6.jpg
image_7.jpg
1.jpg
2.jpg
image_4.jpg
image_9.jpg
image_10.jpg
image_11.jpg
    Warren Feeney, Eyecontact blog-site review.

   Warren Feeney, Eyecontact blog-site review.

anti groovy press 1.jpg
 The Christchurch Press, Vicky Anderson, 22 May, 2015.

The Christchurch Press, Vicky Anderson, 22 May, 2015.

Ramp Gallery, Hamilton (2014)


Burgher Tron (acrylic and ink on Gallery wall with attachments) Ramp Gallery, Hamilton. 2 - 22 October 2014.

This wall work was part of a group exhibition titled Assault on Art Precinct 13. The other artists in the show included: Alex John, Craig McClure and Joseph Scott.

A number of works on paper and various studio items including bric-a-brac were brought into the gallery space. Attached directly to the wall they set the template for the install.

Drawing directly onto the wall and adjusting items in and around each work informed the visual decisions made. The show was loosely based on the 1970’s cult film “Assault on Precinct 13”. Video cassettes alluding to that particular movie era, had film titles scribbled on their sleeves. A Television set was placed on a trolley in front of the wall. The screen of the TV was hand painted based on a still from the movie. Underneath the painting and visible in certain spaces the film continued to run for the duration of the exhibition. A tiny plasticene model sat on a chair in front of the television.

References to art education and the art world within Hamilton filtered through some of the drawings. The phrase ‘Burgher Tron’ appeared like a crest or a banner and another heading proclaimed “The Tron needs U”.

Unused drawings and process was left as detritus along the floor operating as ‘litter sculpture’. The whole is presented as a visual assault and a metaphor for cult films and geographical institutionalized art practice.

image one.jpg
image two.jpg
image three.jpg
image four.jpg
image five.jpg
image six.jpg
DSCN2672.jpg
image seven.jpg
DSCN2709.jpg
image eight.jpg
DSCN2707.jpg

Bath Street Gallery, Auckland (2013)

Solo Exhibition: Encyclo-Dimensional. Bath Street Gallery, Auckland. 30 October - 23 November  2013


encyclo invite.jpg
image_1.jpg
image_7.jpg
image_3.jpg
image_4.jpg
image_2.jpg
image_8.jpg
image_10.jpg
image_11.jpg
image_12.jpg
image_13.jpg
image_15.jpg
image_17.jpg
18.jpg
 The New Zealand Herald. T.J. McNamara, November 16, 2013.

The New Zealand Herald. T.J. McNamara, November 16, 2013.

 Eye Contact Blog-site.

Eye Contact Blog-site.

Ilam Campus Gallery, Christchurch (2013)

Solo Exhibition: Old School. Ilam Art Gallery, Canterbury University, Christchurch.

4 September - 27 September  2013.

A survey of recent drawing. All the work was made on paper using a variety of media such as pen, pencil, charcoal, collage, ink and paint. A video animation in collaboration with Jill Kennedy incorporated many of the drawings in the exhibition.


 Exhibition catalogue. Essay by Richard Fahey, 2013.

Exhibition catalogue. Essay by Richard Fahey, 2013.

1.jpg
3.jpg
4.jpg
2.jpg
7.jpg
8.jpg
DSCN2166.jpg
5.jpg
old school ilam invite.jpg
                  Front of invite card.

                 Front of invite card.


ilam review 2.jpg
   Warren Feeney, Eyecontact blog-site review.

  Warren Feeney, Eyecontact blog-site review.

Jonathan Smart Gallery, Christchurch (2012)

Spacedout

Solo Exhibition: Jonathan Smart Gallery, Christchurch. 5 October - 30 October  2012

A selection of work made during 2012. This included large works on paper, paintings on board and hand painted directly to the wall. A suite of lithographic prints made in collaboration with John Pusatari and an animation in collaboration with Jill Kennedy, which was installed over a number of the exhibited drawings.

1.5.jpg
2.5.jpg
3.5.jpg
4.5.jpg
13.jpg
14.jpg
 Exhibition invite card

Exhibition invite card

 Andrew Paul Wood, The Christchurch Press, 8 October  2012.

Andrew Paul Wood, The Christchurch Press, 8 October  2012.

Peter McLeavey Gallery, Wellington (2012)

Plan 9.5 From Outer Space. Part 11 of the exhibition 'Men On Mars'

Solo Exhibition: Peter McLeavey Gallery, Wellington. 23 May - 9 June  2012

1.jpg
3.jpg
4.jpg
5.jpg
6.jpg
7.jpg
8.jpg
9.jpg
2012 invite.jpg
 Men On Mars. Peter McLeavey Gallery exhibition catalogue. Limited edition (100). Essay by Andrew Paul Wood, 2012.

Men On Mars. Peter McLeavey Gallery exhibition catalogue. Limited edition (100). Essay by Andrew Paul Wood, 2012.

New269.jpg
New270.jpg
New271.jpg
                     Peter Mcleavey during the exhibition.  Photo:  Kent Blechynden/Fairfax NZ

                    Peter Mcleavey during the exhibition.  Photo:  Kent Blechynden/Fairfax NZ

prev / next
Back to Exhibitions 2024-2012
media mage.jpg
24
Auckland Art Fair (2024)
 Front Gallery. R/h side (ink and acrylic on paper) Each work 2100 x 1500mm. Various dates. Photogrsaph: Gina Berreto.
19
Morrinsville Gallery, Waikato (2024)
website pollyanna and twiggy.jpg
28
Brett McDowell Gallery, Dunedin (2024)
 Front Entrance. Ann Parker Gallery, Whanganui, October 27 - 30 November 2024.
13
Ann Parker Gallery, Whanganui (2024)
 Installation View
27
Jonathan Smart Gallery, Christchurch (2023)
IMG_4862.png
19
Ilam Campus Gallery, Christchurch (2023)
IMG_3040.jpeg
17
Anna Miles Gallery, Auckland (2022)
 Front Entrance
28
Jonathan Smart Gallery, Christchurch (2021)
 Invite Poster.
25
Dunedin School Of Art, Dunedin (2019)
_43A1081web.jpg
11
Anna Miles Gallery, Auckland (2018)
evo .jpg
15
McLeavey Gallery, Wellington (2018)
thumb.jpg
14
Jonathan Smart Gallery, Christchurch (2018)
fronyo2.jpg
11
Anna Miles Gallery, Auckland (2018)
install10.jpg
15
Peter McLeavey Gallery, Wellington (2017)
Install 2.jpg
10
Bath Street Gallery, Auckland (2016)
444.jpg
7
Peter McLeavey Gallery, Wellington (2015)
image_8.jpg
14
Bath Street Gallery, Auckland (2015)
image_7.jpg
14
Jonathan Smart Gallery, Christchurch (2015)
11
Ramp Gallery, Hamilton (2014)
image_7.jpg
16
Bath Street Gallery, Auckland (2013)
ghfe.jpg
14
Ilam Campus Gallery, Christchurch (2013)
image_7-1.jpg
8
Jonathan Smart Gallery, Christchurch (2012)
14
Peter McLeavey Gallery, Wellington (2012)

Powered by Squarespace